IPv4
From $0.70 for 1 pc. 40 countries to choose from, rental period from 7 days.
IPv4
From $0.70 for 1 pc. 40 countries to choose from, rental period from 7 days.
IPv4
From $0.70 for 1 pc. 40 countries to choose from, rental period from 7 days.
IPv6
From $0.07 for 1 pc. 14 countries to choose from, rental period from 7 days.
ISP
From $1.35 for 1 pc. 21 countries to choose from, rental period from 7 days.
Mobile
From $14 for 1 pc. 14 countries to choose from, rental period from 2 days.
Resident
From $0.90 for 1 GB. 200+ countries to choose from, rental period from 30 days.
Use cases:
Use cases:
Tools:
Company:
About Us:
Using proxy extensions is an effective method to modify your IP address. This is beneficial for anonymous browsing, circumventing geolocation-based restrictions, and conducting automated tasks that involve sending numerous requests to a web resource.
This review will cover the seven most popular add-ons suitable for these tasks and demonstrate how to configure a proxy using them in browsers.

The extension is available in the add-on stores for Firefox and Google Chrome, making it a popular choice among advanced users. Its flexible settings transform the web browser into a robust environment suitable for tasks such as mass account registrations, mailings, and managing bookings for airlines and hotels.
Additionally, the extension caters to users with basic needs, such as changing IP addresses to bypass blocks or enhancing security on public networks.
Proxy SwitchyOmega allows users to establish rules for automatically changing IP addresses. Its user-friendly interface enables direct browser connection to network gateways installed on the system, facilitating IP address switching as needed. Users can set a default gateway and utilize hotkeys for various tasks, such as activating or deactivating proxy server access. The extension supports PAC scripts, automating most network connection management processes.
Additionally, Proxy SwitchyOmega includes logging features, allowing users to review reports on the number of unsuccessful requests in the open tab.
To effectively use Proxy SwitchyOmega, it's essential to understand the different types of profiles that can be created, which can also be exported and imported within the settings:
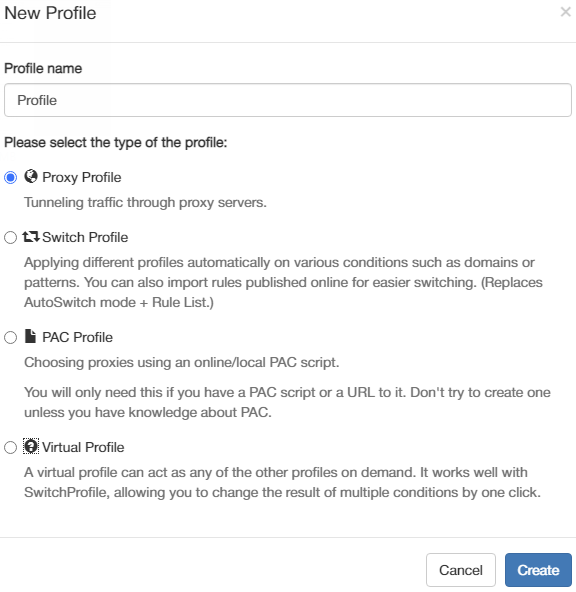
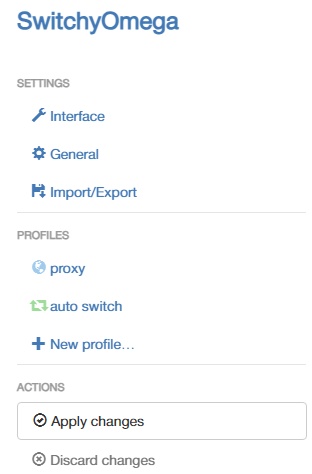
The program interface is organized into several tabs, with the first being “Settings”. This tab allows customization of the extension to fit user needs and includes three subsections:
The “Profiles” tab displays all user-created profiles and includes default profiles without settings. Clicking the “New profile…” button directs the user to the profile settings menu.
Lastly, the “Actions” tab is where users save or cancel the settings they have applied.
| Pros | Cons |
|---|---|
|
+ Automatic proxy server switching + Personalization: hotkeys, autosave, notifications + Ability to restore profiles from a backup, as well as export and import + Supports several types of network proxies with different capabilities + Built-in guide for new users, activated on the first launch of the extension + No advertisements |
− English-only interface and lack of localization − No options for standard proxy list configuration (only when creating PAC-profiles) − Not available in the Opera browser store |
The plugin's versatility makes it suitable for a range of tasks, from basic anonymous internet browsing to conducting mass mailings and other activities that necessitate frequent IP address changes to avoid blocks and captchas.
To fully utilize this extension's capabilities, users need specific knowledge, such as how to set up rules or PAC scripts. However, for those simply looking to mask their real IP address, creating a “Proxy Profile” suffices. This single function of the addon is enough to achieve basic anonymity online.
The Proxy SwitchyOmega extension provides multiple proxy setup options thanks to its variety of proxy profiles. This article includes straightforward instructions for setting up a proxy, requiring no special skills.

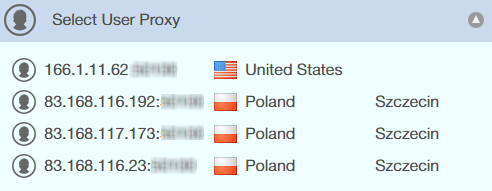
The next extension, Best Proxy Switcher, offers a more limited set of functions, but these are sufficient for basic use. It includes a selection of free public proxies, and users also have the option to create their own configurations.
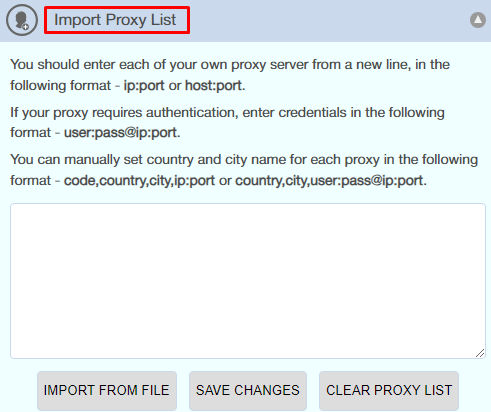
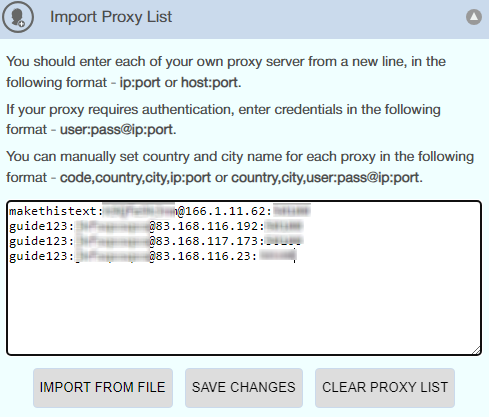
The plugin offers a range of useful functions that enhance its convenience and efficiency. Users can download proxy lists from files on their computer or add them manually. Keyboard shortcuts are available to accelerate operations.
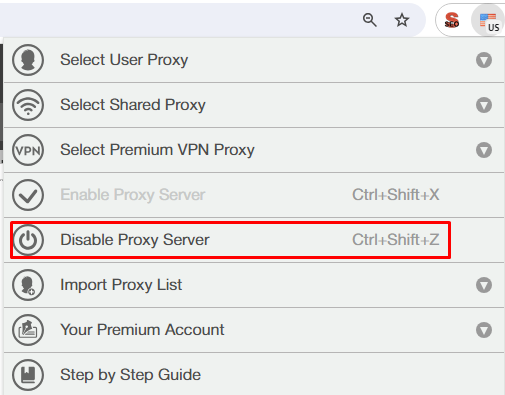
For newcomers, there is a detailed training guide that assists in quickly mastering the add-on's features. The main functions are accessible from the main menu, which appears when you click on the extension icon. This menu serves as a central workspace for managing all of the extension's capabilities simultaneously.
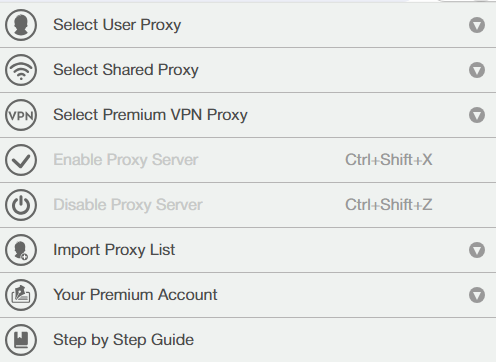
With its simplicity and streamlined interface, the extension is ideal for users without prior experience, enabling them to bypass internet blocks and surf the web anonymously.
| Pros | Cons |
|---|---|
|
+ Simple interface with intuitive controls + Quick activation and deactivation using keyboard shortcuts + Ability to import large volumes of proxies from files + Supports correct input format hints |
− Manual process of switching IP addresses − Proxy catalog rarely updates and often includes non-working or dead addresses − Not available in the Opera browser store |
The extension is well-suited for basic tasks such as visiting blocked sites, ensuring secure internet access, and maintaining network anonymity.


The Proxy Switcher & Manager extension is versatile, featuring multiple working modes to accommodate various needs. It is compatible with Google Chrome, Opera, and Firefox browsers, making it a flexible tool for different user preferences.
The main features of each mode in which the Proxy Switcher & Manager extension can operate are:
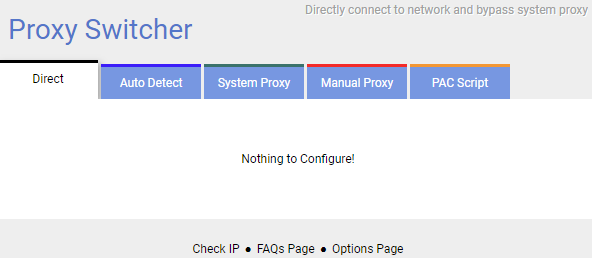
Thanks to the variability of Proxy Switcher and Manager, the add-on proves useful for a variety of tasks such as testing, mass data collection, mailing, and bypassing geo-blocks. Its capability to distinguish between system and browser proxies enables convenient simultaneous use of applications and a web browser from different IP addresses.
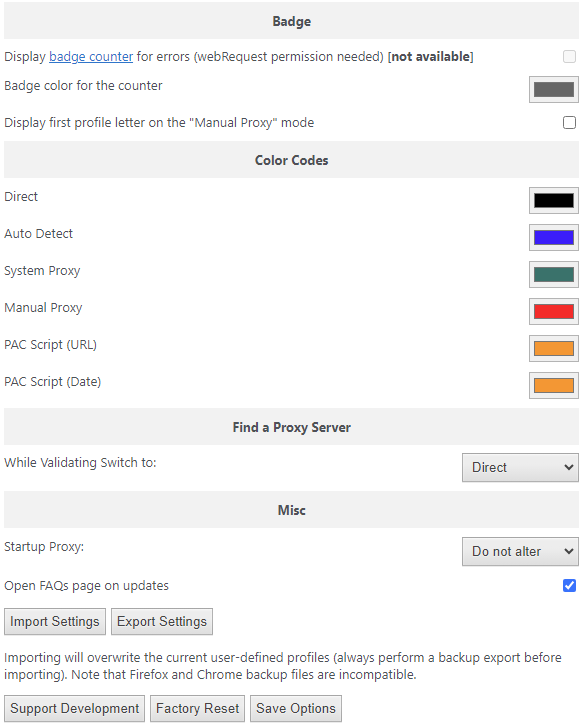
Proxy Switcher also offers extensive customization options. Users can set up notifications to receive error messages and can change the color scheme of the tabs to easily distinguish between operating modes. Additionally, the extension supports two types of proxies:
The extension also supports the import and export of settings and includes a support and FAQ section to address any issues that may arise.
| Pros | Cons |
|---|---|
|
+ A variety of working modes and easy selection are needed in the working window + Customization options and notification settings + Convenient realization of automation through proxy detection scripts + Intuitive interface with easy controls and a knowledge base for learning functionality |
− Proxies only load partially − No localization - all functionality in English only |
The extension is ideal for those who need to swiftly switch between different IP addresses. This capability is crucial for protecting privacy, bypassing geographic restrictions, and performing automated actions without encountering captchas or blocks.
The simplest method to utilize Proxy Switcher & Manager with a proxy is to set it up in “Manual Proxy” mode. This article offers step-by-step instructions on how to configure it accordingly.

The extension features two main menus:
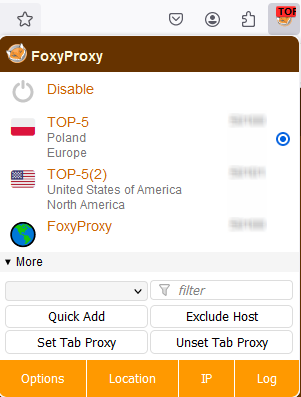
Given its extensive functionality, Foxy Proxy can be utilized in complex scenarios that require automatic changing of IP addresses.
One of the standout features of the extension is the ability to configure proxies for individual tabs based on pre-set URLs, enabling precise control over connections for each site. Additionally, the extension supports operation in incognito mode, allowing users to browse from different IP addresses and enhance their anonymity.
The extension also includes a function to block specific domains from using proxy servers, preventing unwanted connections. Proxy switching can be automated using custom templates that activate based on user settings.
For enhanced privacy, the extension offers the option to disable WebRTC, helping prevent real IP address leaks through this technology. The built-in request logging feature allows for analyzing the connection history from a specific IP, aiding in error detection and resolution. All these functionalities are conveniently located in the control panel, simplifying the setup process.
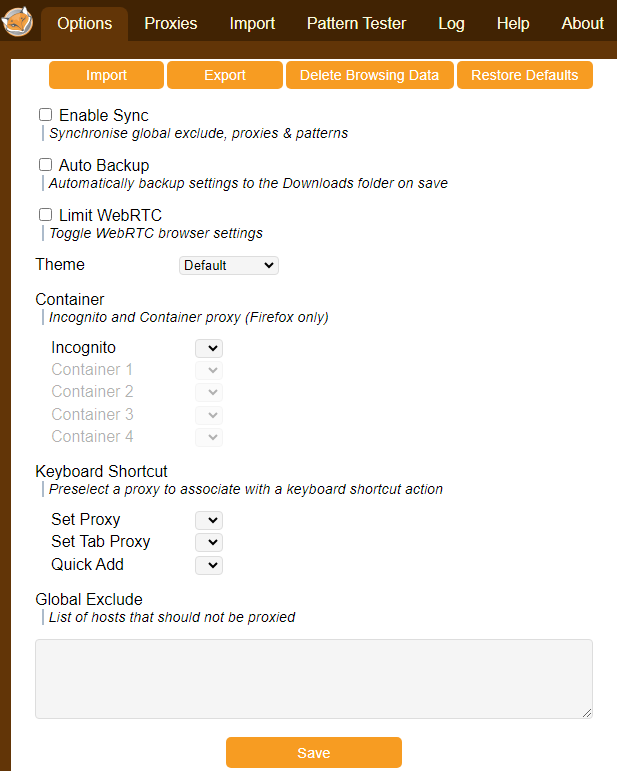
Foxy Proxy also allows for extensive customization. Users can change the theme, set up convenient keyboard shortcuts, and easily identify the required proxy with visual identifiers like a country flag and a color mark.
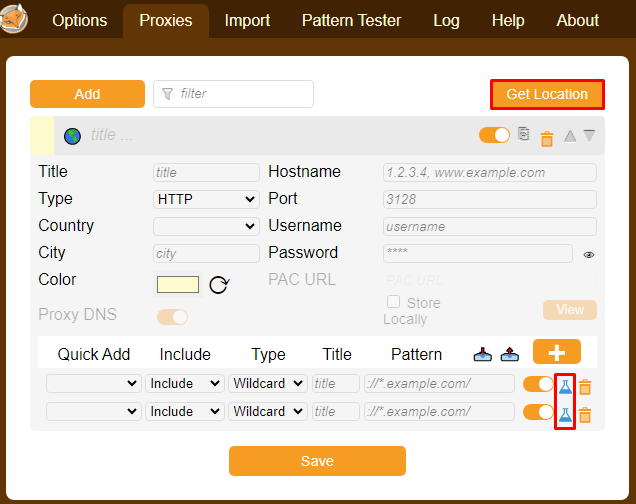
Moreover, Foxy Proxy includes a location checker and tests for evaluating configured proxy change templates, available during the proxy configuration creation process.
| Pros | Cons |
|---|---|
|
+ Automatic switching templates, adding exclusions, and other advanced functionalities + Settings for synchronization, creating backup copies of proxy profiles and templates + Management of WebRTC technology directly within the extension, eliminating the need for a separate extension for deactivation + Customization of the external appearance of the extension + Ability to set hotkeys + Uploading and downloading proxy lists for data exchange between devices or users |
− Disrupted interface − Lack of localization for additional materials − Not all features are adapted for browsers other than Firefox, for example, log storage is not available in Chrome |
Considering the advantages and limitations of the FoxyProxy extension, it is recommended for accessing sites that are blocked in the user's actual region, creating and managing multiple accounts, conducting mailings, and ensuring anonymous Internet access.
To configure a proxy in FoxyProxy, follow our instructions. The interface is consistent across all browsers, so the setup process will be the same. Management is conducted through a convenient menu that appears after clicking on the extension icon.

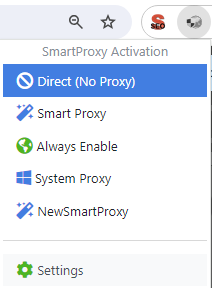
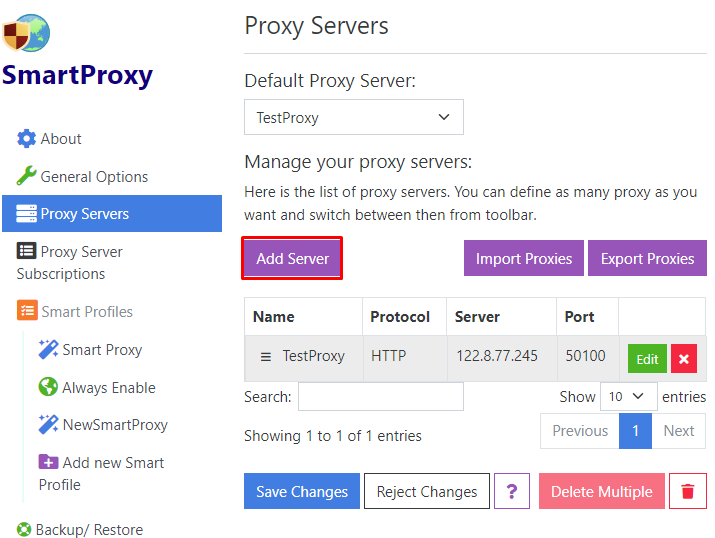
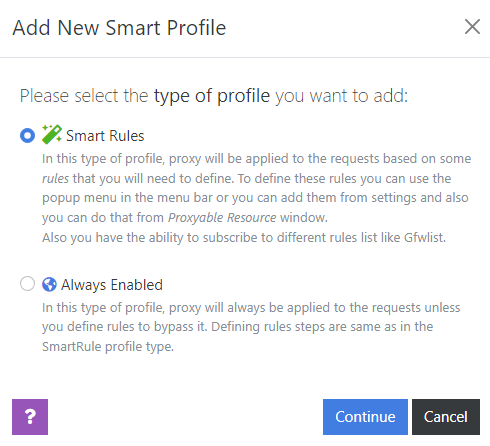
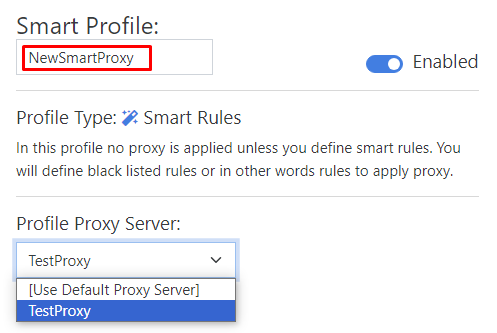
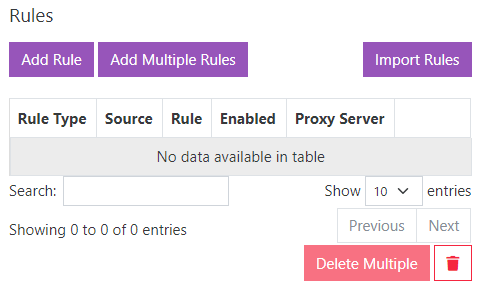
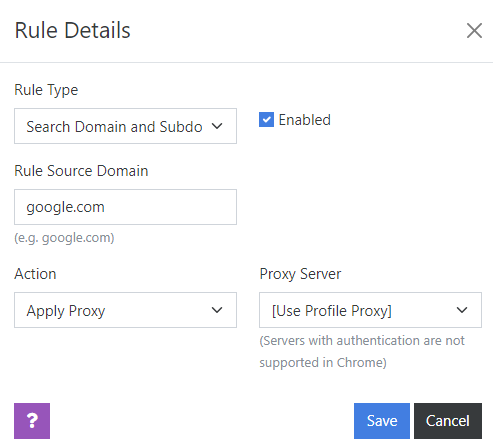
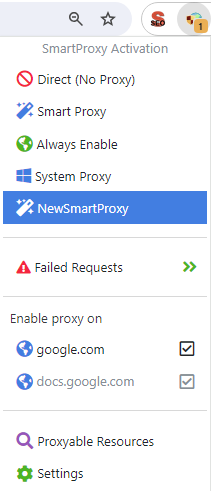
The SmartProxy extension is designed for the efficient management of large pools of IP addresses. Its standout feature, the “Smart Proxy”, automates the selection and connection to the appropriate proxy server based on predefined rules. This functionality offers flexible proxy management across various resources, simplifying the process for users without requiring deep technical knowledge or the creation of PAC scripts.
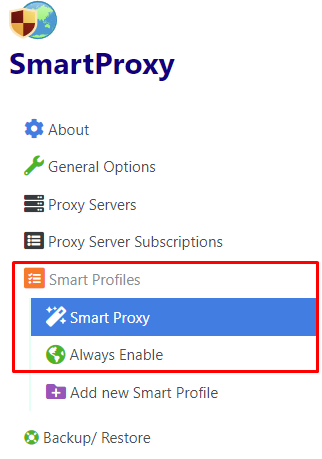
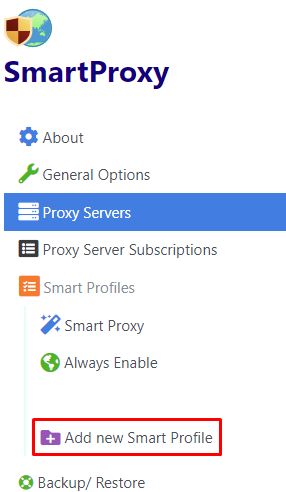
To effectively use SmartProxy, you should familiarize yourself with the two main types of profiles available for configuration within the extension:
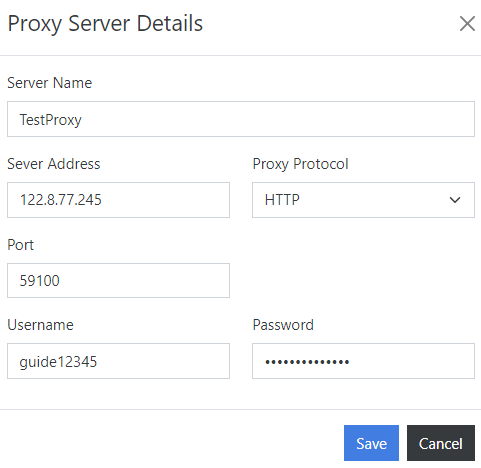
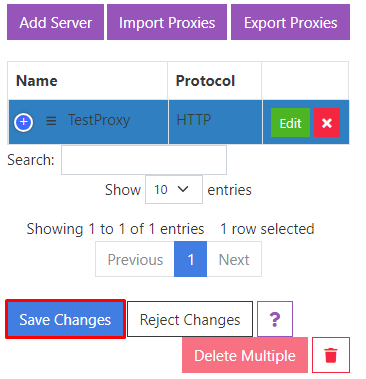
Profiles are configured through the extension’s settings menu, where SmartProxy provides a user-friendly interface that allows for quick and easy rule setting, even for those without specialized knowledge.
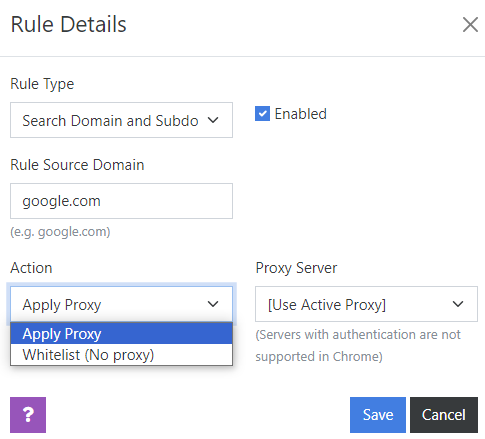
Additional features of this plugin significantly enhance its functionality. For instance, users can subscribe to various lists of proxy servers from third-party services. These lists are automatically updated, ensuring that connections remain relevant and reliable.
The plugin also supports the creation of backup copies of settings, enabling users to save all current configurations. Both full and partial backups can be created, and settings can be restored from a local file as needed.
A particularly notable feature is the ability to change IP addresses even in incognito mode, which enhances anonymity while browsing the internet.
| Pros | Cons |
|---|---|
|
+ A variety of extension indicators that promptly inform the user about the connection status + Ability to set advanced connection parameters + Functions for managing IP-address pools + Intuitive and user-friendly interface that ensures easy navigation + Ability to integrate subscriptions to proxy lists |
− SmartProxy mode only works in Firefox |

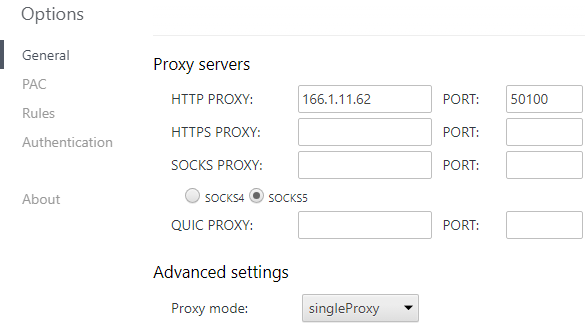
The Proxy Helper extension offers three primary functions designed to assist with various tasks:
All these features are accessible through a unified interface that opens in a new browser tab, making it straightforward to manage.
| Pros | Cons |
|---|---|
|
+ Ability to use configuration files for proxies + Setting up a backup server in case the main IP addresses fail + Quick switching to system connection settings + Minimalist interface, not cluttered with details, easy to navigate |
− Inability to work with proxy lists − Only available for Google Chrome users |
Proxy Helper is an ideal tool if you need to proxy the entire browser while excluding a few selected sites. The extension is also well-suited for those who require the use of a PAC script, thanks to its convenient implementation of this feature.
To set up a proxy, follow this simple guide for the Proxy Helper extension.

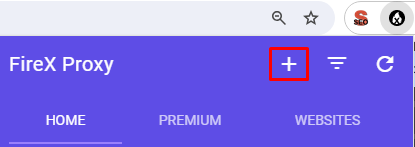
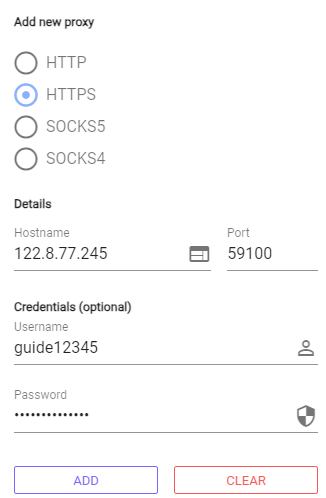
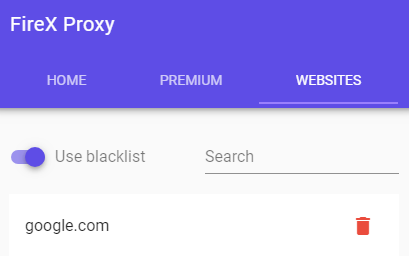
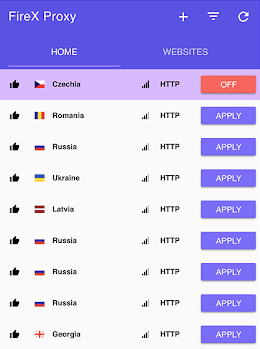
FireX Proxy is one of the simplest and most accessible extensions available, offering basic functionality for proxying internet traffic. Its key features include:
FireX is exclusively compatible with the Google Chrome browser.
| Pros | Cons |
|---|---|
|
+ Supports all protocols + Intuitive interface with a simple and clear design + Ability to select multiple sites to visit via proxy |
− Cannot import a list of IP addresses − Proxy activation and deactivation only in manual mode |
This tool is particularly useful for individual users who need to bypass blocking and enhance online security, as it lacks functions for work automation.
Finally, let's review a comparison of all 7 extensions in the provided table.
| Extension | Proxy SwitchyOmega | Best Proxy Switcher | Proxy Switcher and Manager | FoxyProxy | SmartProxy | Proxy Helper | FireX |
|---|---|---|---|---|---|---|---|
| Proxy lists | - | + | - | + | + | - | - |
| PAC scripts | + | - | + | + | - | + | - |
| Exclusions and whitelists | + | - | + | + | + | + | + |
| Hotkeys | + | + | - | + | - | - | - |
| Backup copies | + | - | + | + | + | - | - |
| Customization | - | - | + | + | - | - | - |
| Available in Google Chrome | + | + | + | + | + | + | + |
| Available in Mozilla Firefox | + | + | + | + | + | - | - |
| Available in Opera | - | - | + | - | + | - | - |
