183 views

Setting up a proxy in Kodai AIO Bot

Kodai AIO is an advanced bot designed for the resale of branded goods, operating across major digital markets and catering to smaller dealers. It functions on platforms such as Shopify, Nike, Ruffle, and Adidas, and automatically monitors new deliveries. The bot is adept at handling transactions on popular marketplaces, including Amazon, Walmart, eBay, Overstock, and Best Buy.

Available for Windows and Mac operating systems, the Kodai AIO Bot specializes in the purchase of sneakers. However, it is not a free tool and is not always readily available.

To maximize the effectiveness of the Kodai Sneaker Bot, a proxy server is essential. The use of a proxy in Kodai AIO is crucial for circumventing geographical restrictions and accessing international trading platforms. Proxies play a key role in preventing user account blocks, which can occur due to frequent access from a single IP address to sneaker release sites. The bot also offers features for checking connected IPs and organizing proxies into groups.

Video tutorial for proxy configuration in Kodai AIO Sneakerbot

How to set up a proxy in Kodai AIO Sneakerbot

To effectively integrate proxies into Kodai AIO for secure connections to trading platforms, follow these steps.
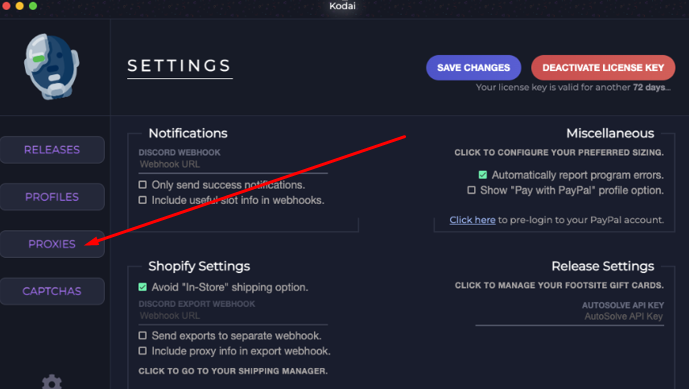
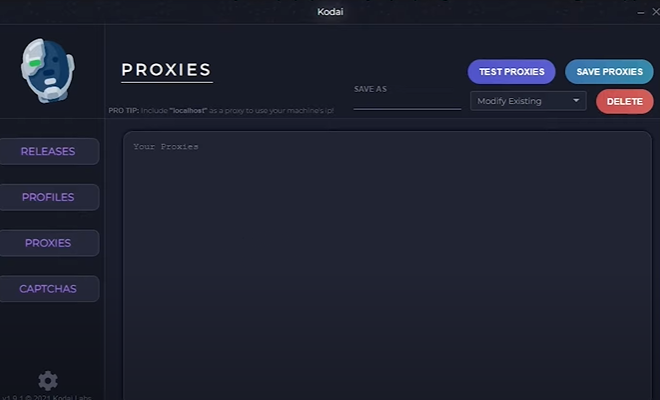
  1. Open Kodai AIO on your Windows or macOS device. In the main menu, navigate to the “Proxies” section listed among the configuration parameters.
  2. image003.png

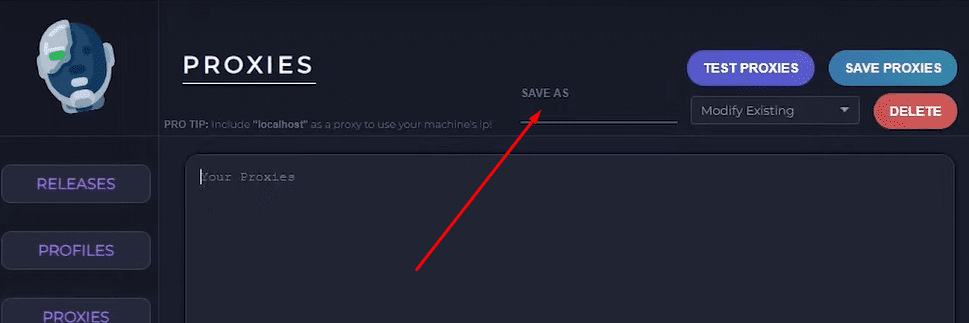
  3. In the “Proxies” tab, you’ll see a large field labeled “Your Proxies”. Here, manually input or copy-paste the IP addresses and port numbers of your acquired proxies. The program accepts three formats for data entry:
    • http://username:password@proxyserver:port” - including the connection protocol, username, password, server address, and port.
    • “username:password@proxyserver:port” - similar to the first, but the protocol is selected automatically.
    • “proxyserver:port” - for specifying only the IP and port.

    image004.png

  4. Name the group of IP addresses for easy identification by entering a title in the “Save As” field at the top.
  5. image005.png

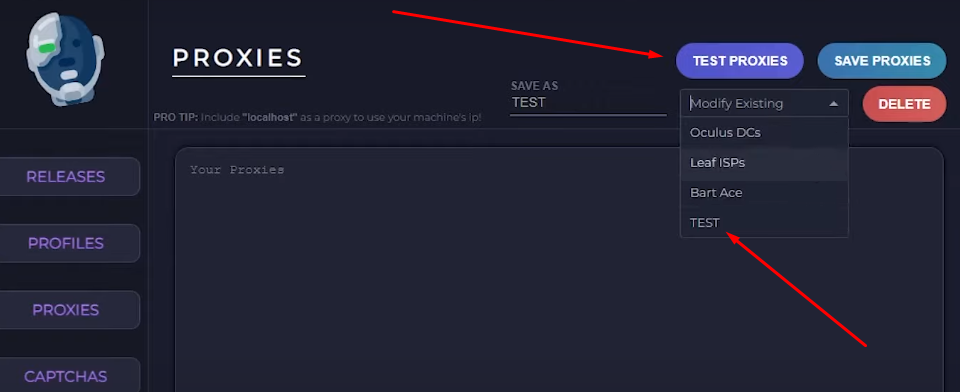
  6. To verify the functionality of the proxies, go to the “Modify Existing” tab and select “TEST” and hit the “Test Proxies” button.
  7. image007.png

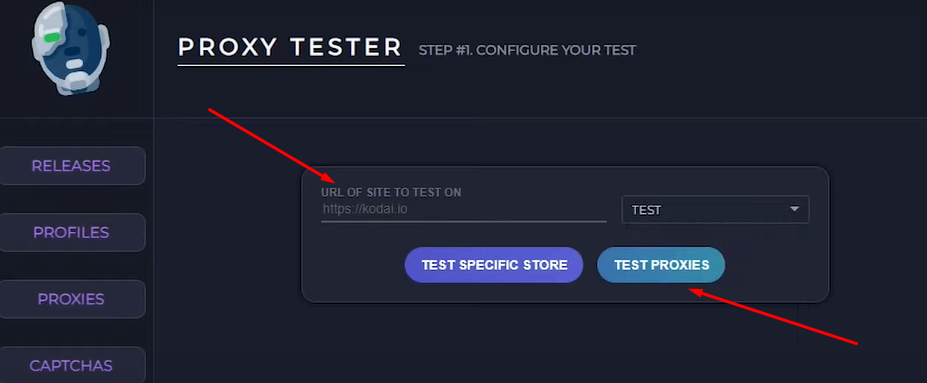
  8. Choose the type of proxy to test.
  9. image009.png

  10. Enter a website address where the connection quality will be tested. The default is the utility developer’s homepage, but you can opt for a different site or store. Click “Test Proxies” once more to initiate the check.
  11. image010.png

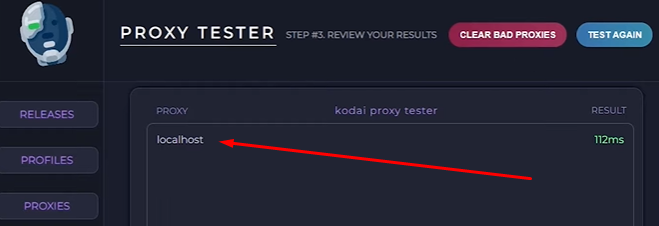
  12. If the test identifies no issues and the connection is stable, return to the list of addresses and click “Save Proxies”.
  13. image012.png

For high quality data processing and constant availability of proxy connections, choose proxy types with the highest trust factor.