IPv4
From $0.70 for 1 pc. 40 countries to choose from, rental period from 7 days.
IPv4
From $0.70 for 1 pc. 40 countries to choose from, rental period from 7 days.
IPv4
From $0.70 for 1 pc. 40 countries to choose from, rental period from 7 days.
IPv6
From $0.07 for 1 pc. 14 countries to choose from, rental period from 7 days.
ISP
From $1.35 for 1 pc. 21 countries to choose from, rental period from 7 days.
Mobile
From $14 for 1 pc. 14 countries to choose from, rental period from 2 days.
Resident
From $0.90 for 1 GB. 200+ countries to choose from, rental period from 30 days.
Use cases:
Use cases:
Tools:
Company:
About Us:
BlueStacks, a widely recognized Android emulator for Windows, was initially developed for app developers and testers. It enables the launching and testing of mobile applications directly on a computer. Over time, BlueStacks gained popularity among users who appreciated the large desktop screen experience but were also fond of mobile gaming.
BlueStacks facilitates the running of various mobile applications, including office tools, organizers, calendars, and maps. However, its most frequent use is among gamers. Through BlueStacks, games like PUBG and the popular shooter Free Fire can be played on a PC, participating in battle royales and more. Essentially, it allows playing almost any mobile game. Thanks to its architecture, even less powerful laptops and desktop computers can smoothly run mobile games with high system requirements.
However, the PC Android gaming emulator BlueStacks for Windows does not come with an in-built proxy client. This can be a hindrance if certain games or in-app purchases are blocked in your country. Setting up a proxy server becomes a necessity in such cases. For instructions on how to use a proxy in BlueStacks, refer to our detailed guide below.
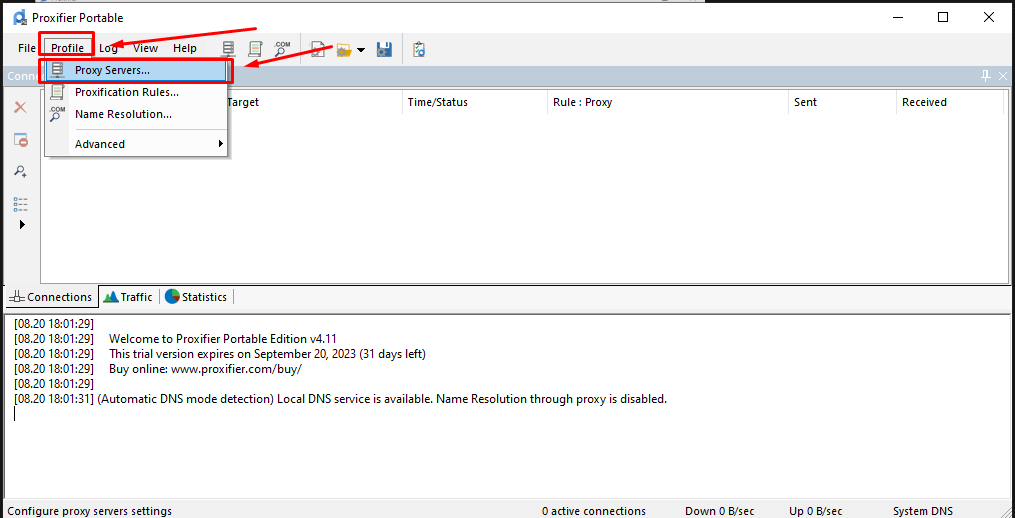
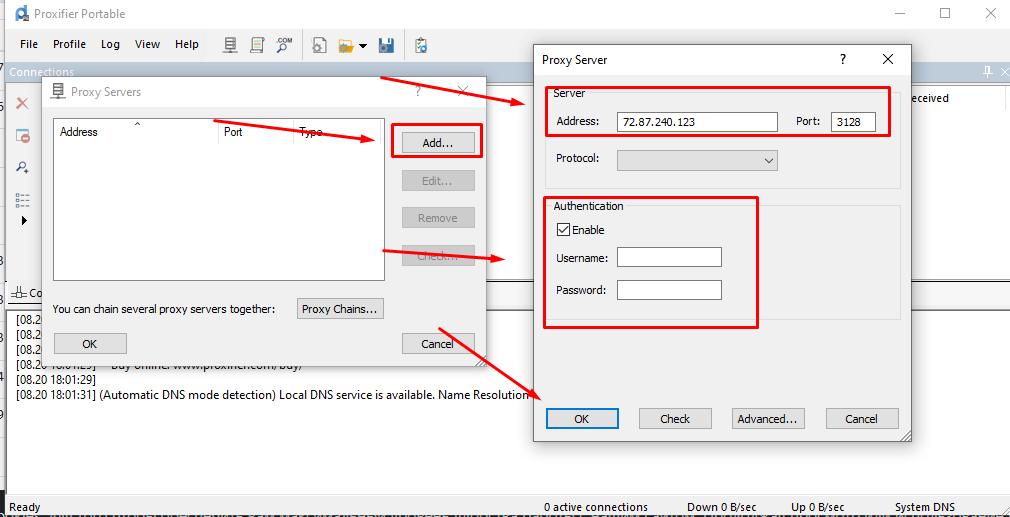
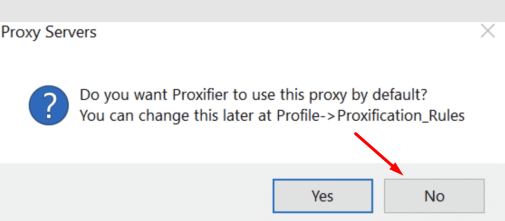
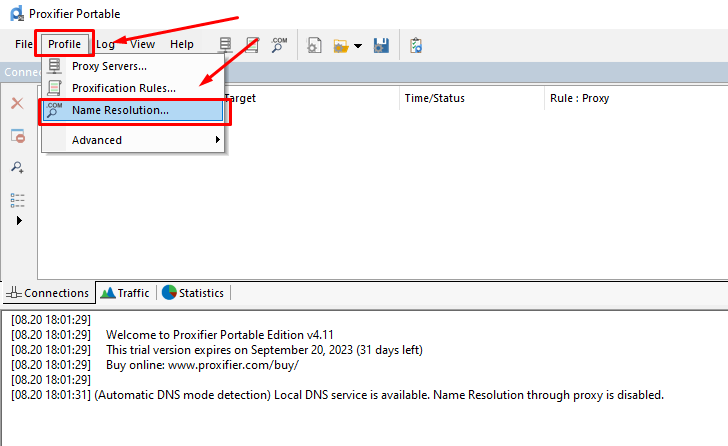
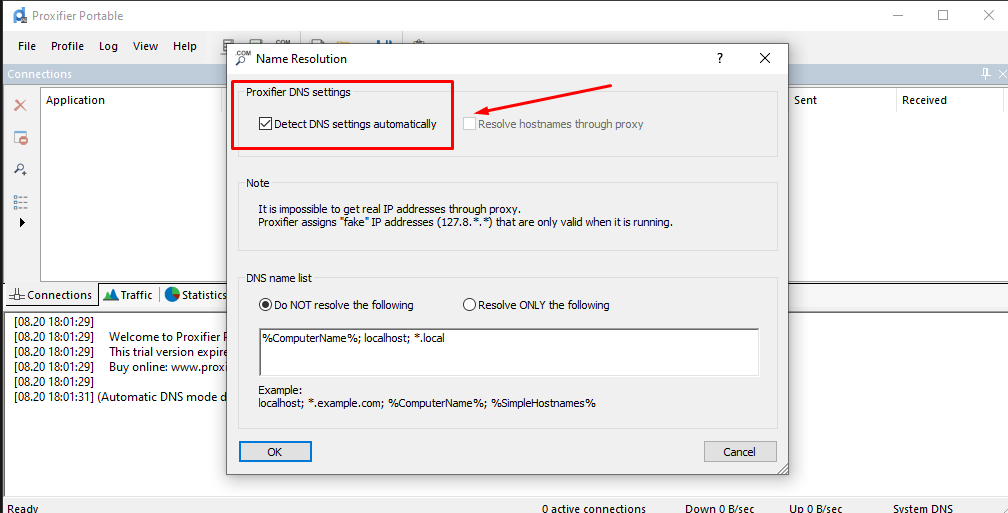
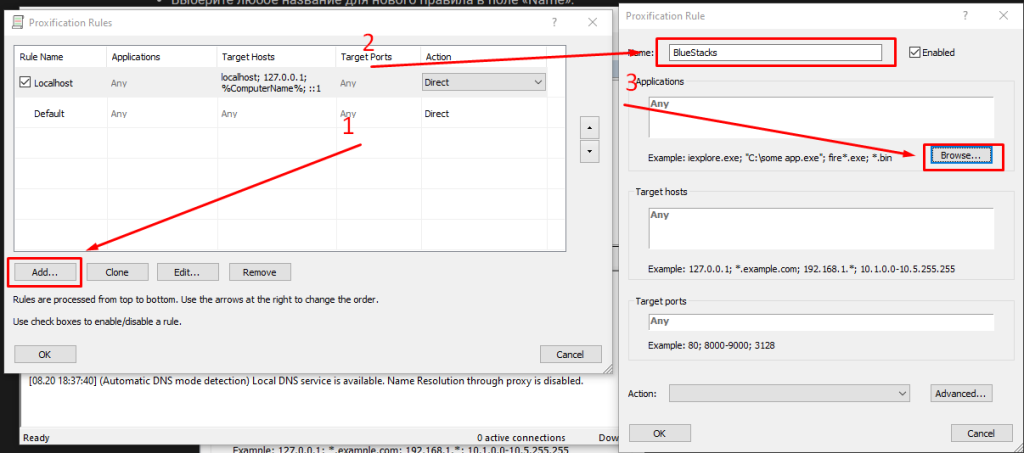
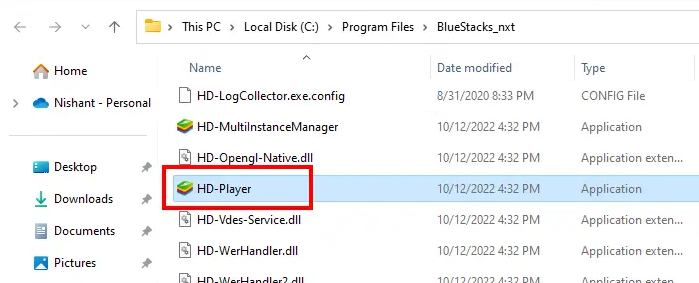
To configure a proxy in BlueStacks, one effective method is using the straightforward and user-friendly Proxifier proxy client. This approach allows for maintaining a direct connection for other applications while setting up proxy redirection specifically for BlueStacks 5.
Here's how to set up a proxy for BlueStacks via Proxifier:

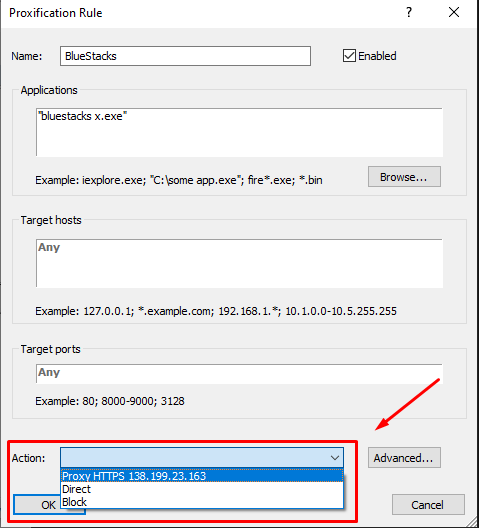
With these steps completed, you can run Bluestacks and access previously locked content.
