IPv4
From $0.70 for 1 pc. 40 countries to choose from, rental period from 7 days.
IPv4
From $0.70 for 1 pc. 40 countries to choose from, rental period from 7 days.
IPv4
From $0.70 for 1 pc. 40 countries to choose from, rental period from 7 days.
IPv6
From $0.07 for 1 pc. 14 countries to choose from, rental period from 7 days.
ISP
From $1.35 for 1 pc. 21 countries to choose from, rental period from 7 days.
Mobile
From $14 for 1 pc. 14 countries to choose from, rental period from 2 days.
Resident
From $0.90 for 1 GB. 200+ countries to choose from, rental period from 30 days.
Use cases:
Use cases:
Tools:
Company:
About Us:
Linked Helper is an automation tool designed for LinkedIn, offering both free and paid versions. It assists users in executing various tasks, including:
It's important to note that LinkedIn's terms of service generally discourage the use of automation tools. To protect your account from the risk of suspension, it is recommended to use Linked Helper with private proxy servers. Setting up a proxy allows for the use of multiple accounts, bypasses IP-based blocking, enables anonymous profile viewing, and overcomes geographical restrictions.
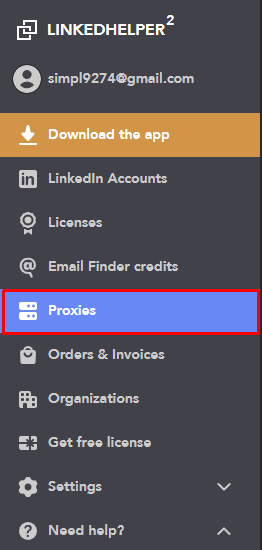
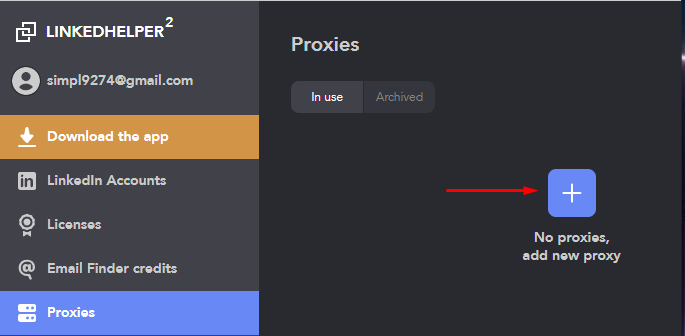
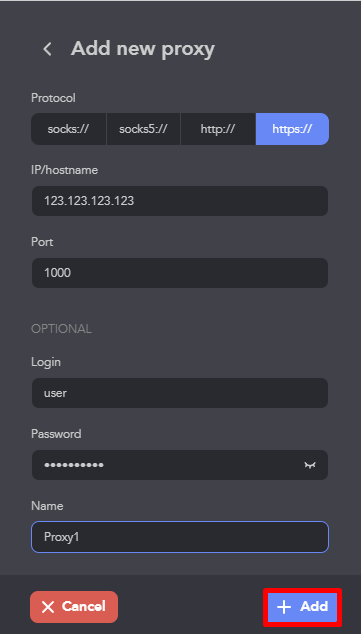
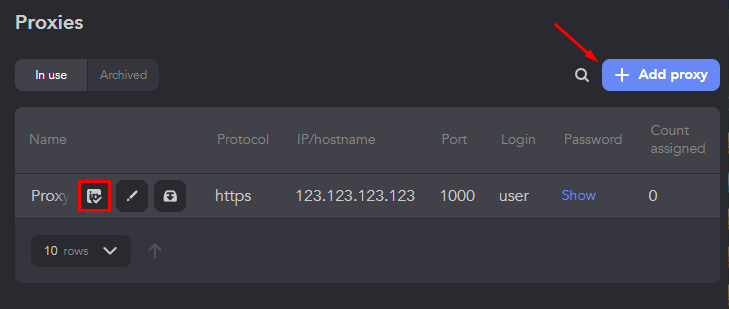
To configure a proxy in Linked Helper 2, follow these step-by-step instructions:


The proxy configuration in Linked Helper 2 is now complete. The configured IP-address encrypts the traffic, allowing users to perform actions anonymously within the application, circumvent restrictions, and utilize multi-accounts.
