1939 views

Proxy settings guide for FoxyProxy on Chrome and Firefox

FoxyProxy is an extension for the browser that allows you to set up a proxy server for Chrome or Firefox. This is much more convenient than installing additional programs on the device.

After setting up a proxy through FoxyProxy, you can connect several servers at once and switch between them while working. This feature will come in handy if you work with a large number of social media accounts.
Video tutorial for proxy configuration in Chrome and Firefox

How to set up a proxy in FoxyProxy on Chrome

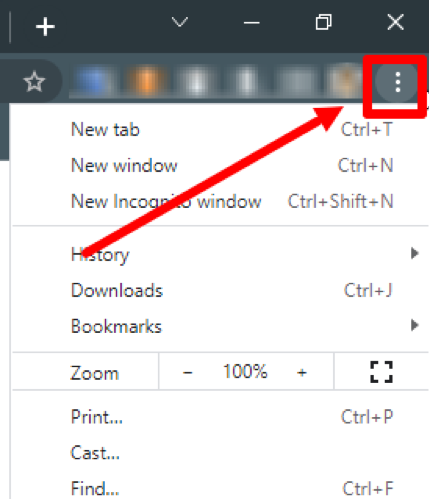
  1. Open the browser and go to the Menu (click on the three dots in the upper right corner).
  2. 1:1.png

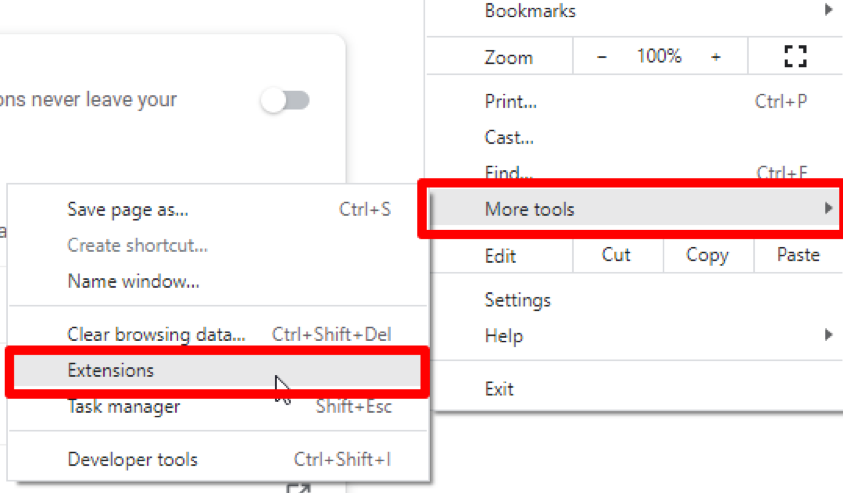
  3. Hover over "More Tools" and open the "Extensions" tab.
  4. 2:1.png

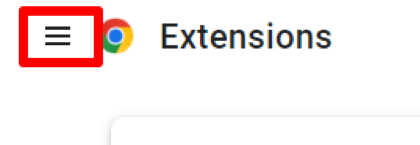
  5. Click on the three bars on the left.
  6. 3:1.png

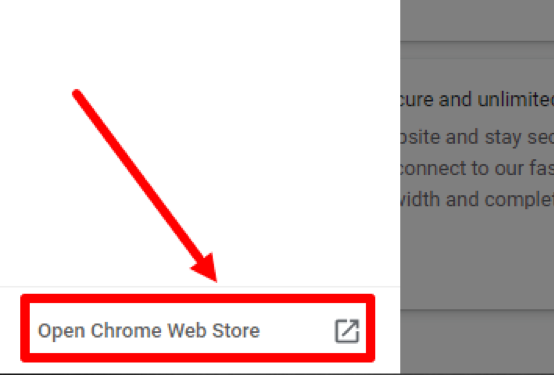
  7. Select the "Open Chrome Web Store" section.
  8. 4:1.png

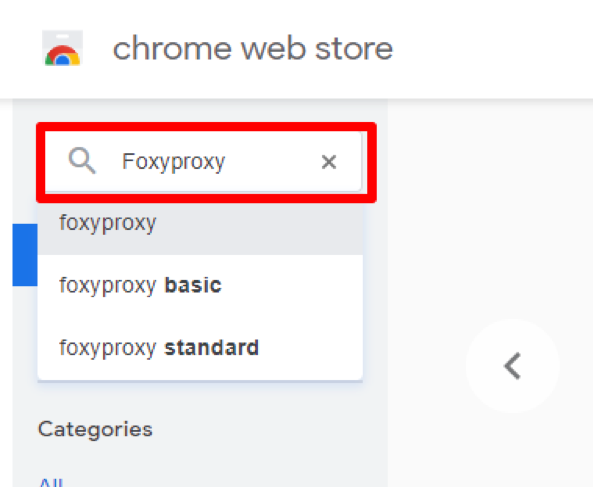
  9. In the Chrome store, in the search bar, type "FoxyProxy" and press Enter.
  10. 5:1.png

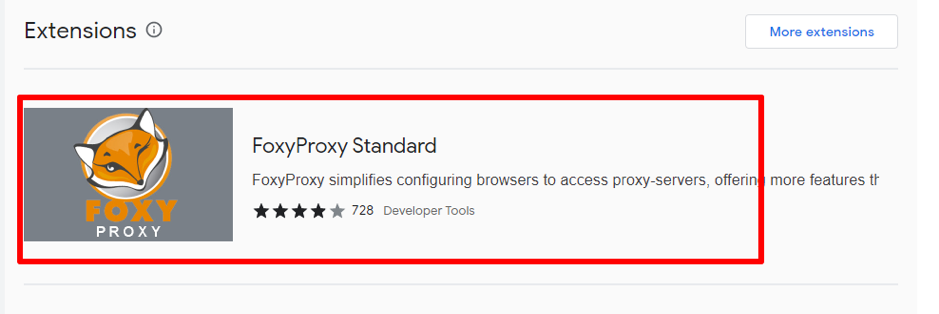
  11. Select the first extension, then click on the "Add to Chrome" button
  12. 6:1.png

    6:2:1.png

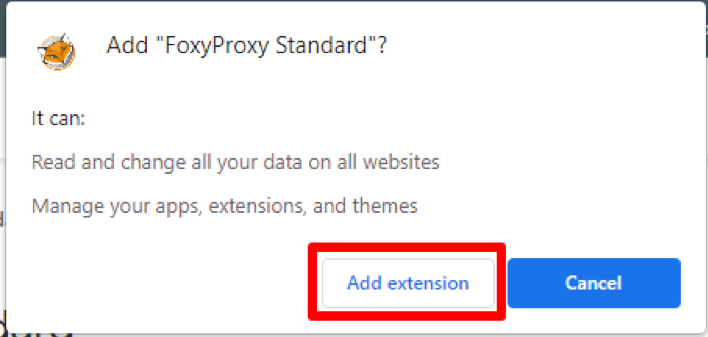
  13. In the popped-up window, select "Add extension".
  14. 7:1.png

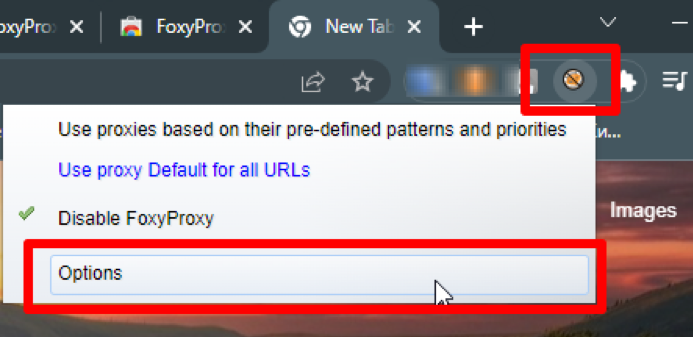
  15. You have installed the extension, now let's move on to setting up a proxy. Click the FoxyProxy icon on the top bar and select "Options".
  16. 8:1.png

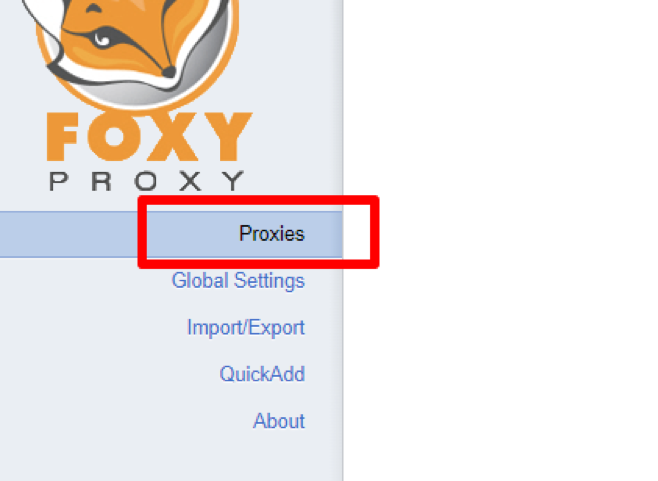
  17. Go to the "Proxies" section.
  18. 9:1.png

  19. Click on the "Add New Proxy" button.
  20. 10:1.png

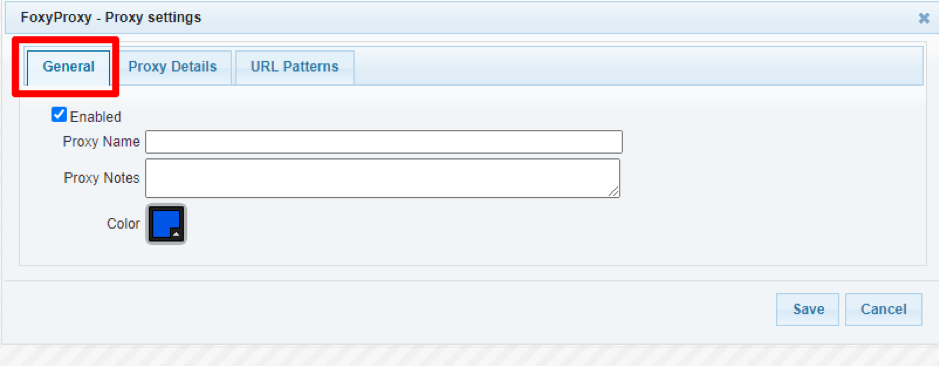
  21. In the "General" tab, type in any name for the proxy server.
  22. 11:1.png

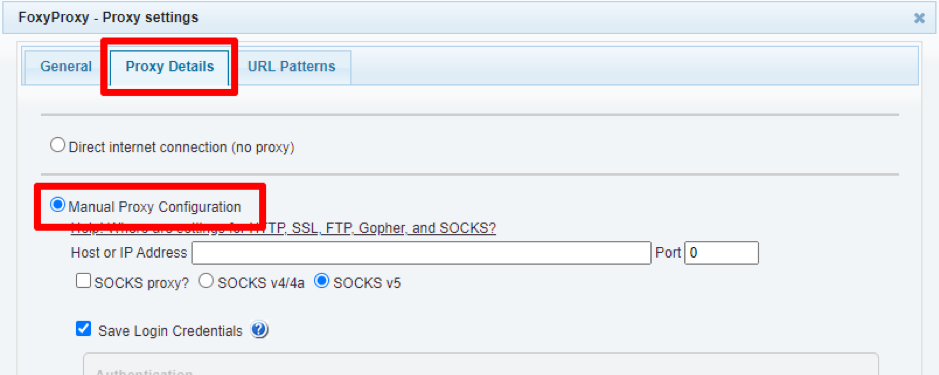
  23. Open the "Proxy Details" tab and check the "Manual Proxy Configuration" box.
  24. 12:1.png

  25. Enter the IP address and port. Also, select the type of your proxy server.
  26. 13:1.png

  27. Check the box next to "Save Login Credentials" and below enter the Username and Password (twice) for the proxy.
  28. 14:1.png

  29. Click on the "Save" button.
  30. 15:1.png

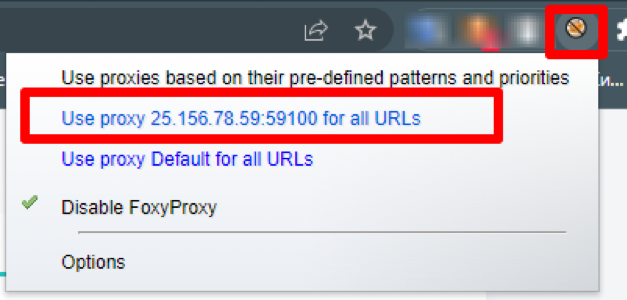
  31. Now click on the FoxyProxy icon and select the server you just added. Done!
  32. 16:1.png

How to set up a proxy in FoxyProxy on Firefox

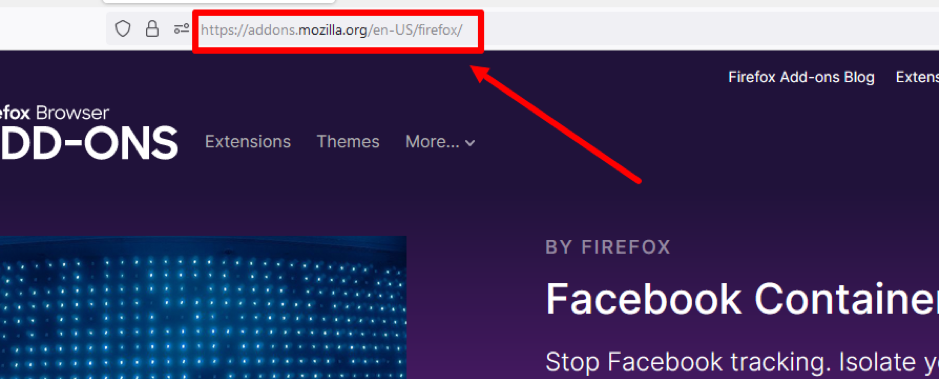
  1. Open the application and go to the browser's official website at the link: https://addons.mozilla.org/en-US/firefox/
  2. 1:2.png

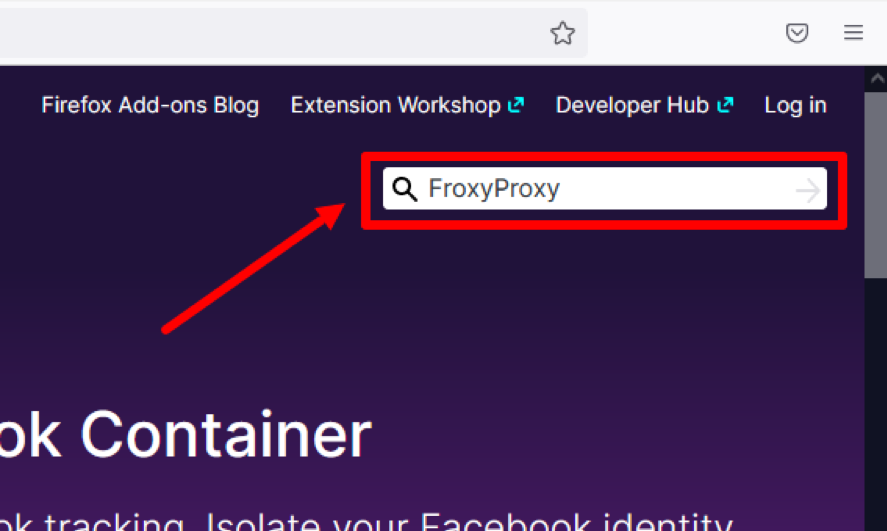
  3. Type "FroxyProxy" in the search bar, and press Enter.
  4. 2:2.png

  5. Select the required extension.
  6. 3:2.png

  7. Click on the "Add to Firefox" button.
  8. 4:2.png

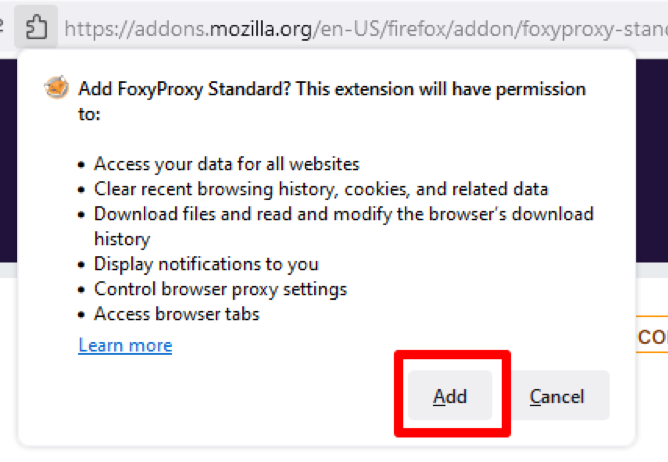
  9. In the popped-up window, click "Add".
  10. 5:2.png

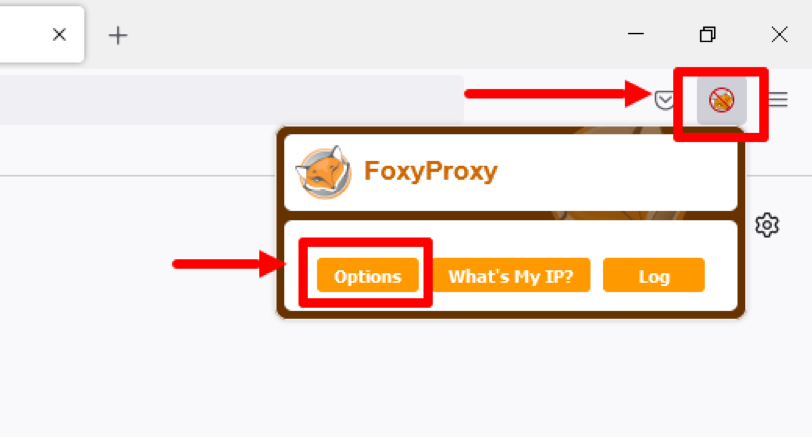
  11. On the bookmarks bar, click the extension icon and then the “Options” button.
  12. 6:2.png

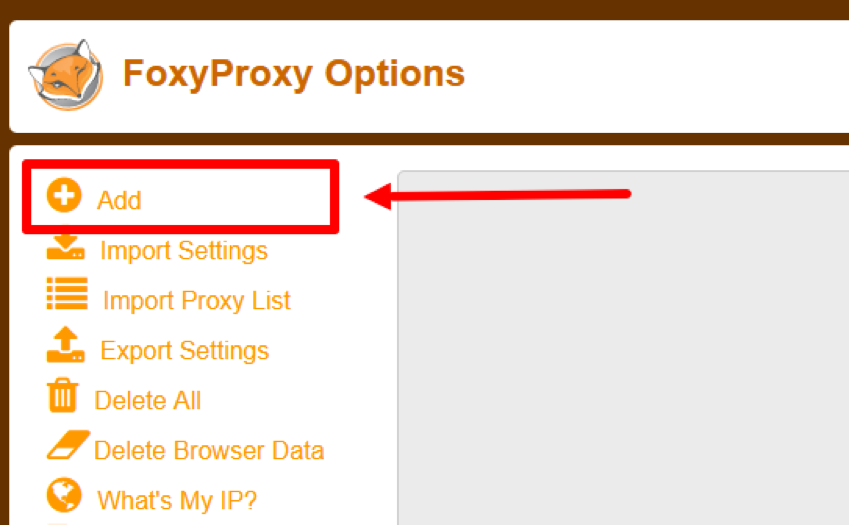
  13. Go to the "Add" section.
  14. 7:2.png

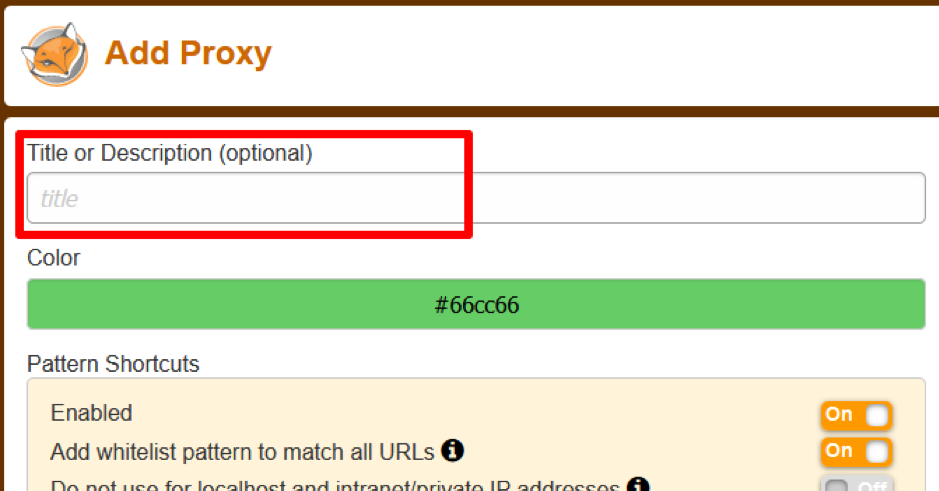
  15. Here you can enter any task name (optional).
  16. 8:2.png

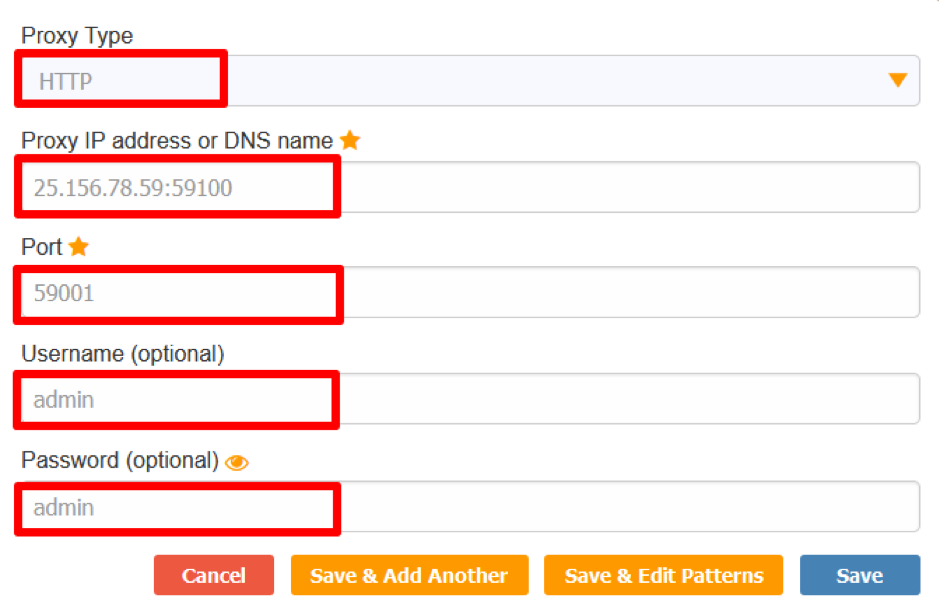
  17. Enter all the proxy server details in the required fields.
  18. 9:2.png

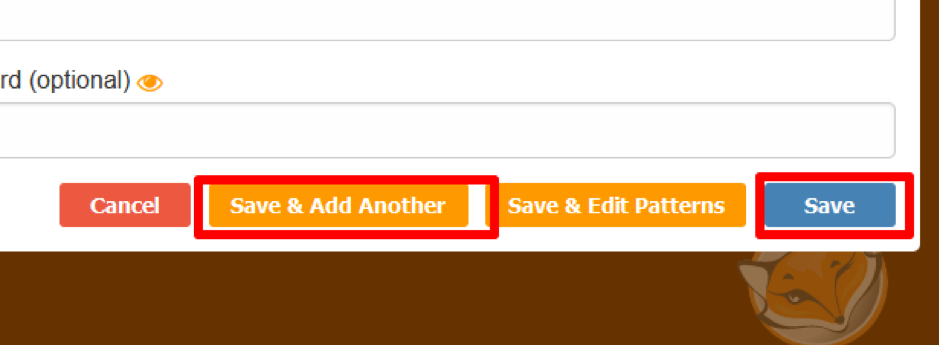
  19. Click on the "Save" button to apply changes, or "Save & Add Another" to save and add a new proxy.
  20. 10:2.png

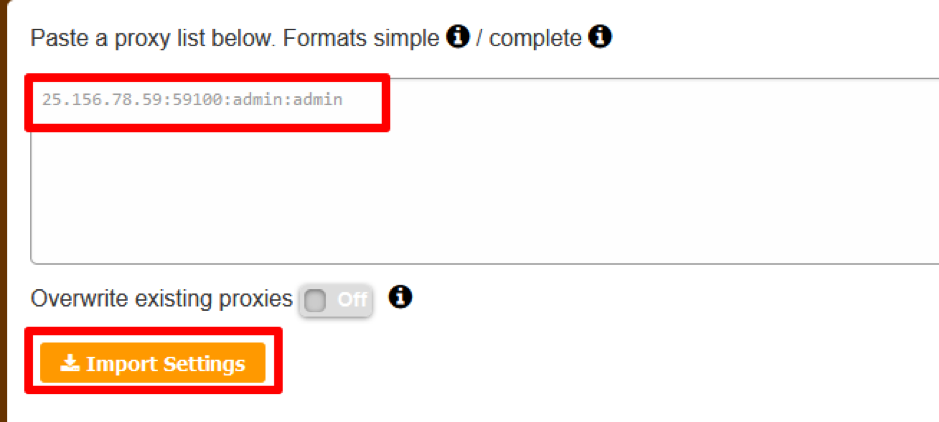
    You can also add a list of proxies at once. To do this:
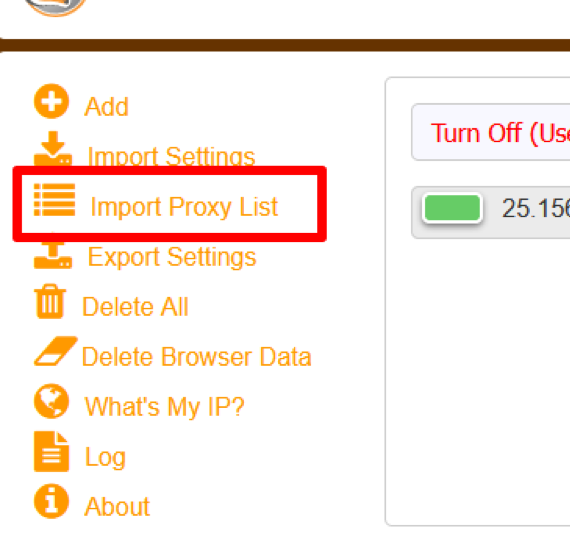
  21. Go to the "Import Proxy List" section.
  22. 11:2.png

  23. Enter proxy data in the format: IP:port:username:password. You can enter as many servers as you need. Then click on the "Import Settings" button.
  24. 12:2.png

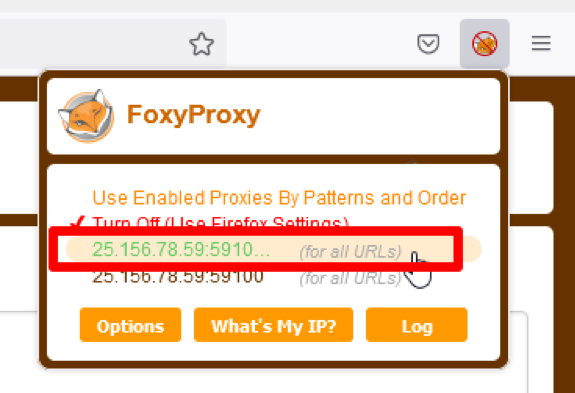
  25. Click the FoxyProxy icon on the taskbar and select the configured proxy. Done!
  26. 13:2.png

Now you know how to set up a proxy in the FoxyProxy extension for Chrome and Firefox browsers!