IPv4
From $0.70 for 1 pc. 41 countries to choose from, rental period from 7 days.
IPv4
From $0.70 for 1 pc. 41 countries to choose from, rental period from 7 days.
IPv4
From $0.70 for 1 pc. 41 countries to choose from, rental period from 7 days.
IPv6
From $0.07 for 1 pc. 14 countries to choose from, rental period from 7 days.
ISP
From $1.35 for 1 pc. 23 countries to choose from, rental period from 7 days.
Mobile
From $14 for 1 pc. 14 countries to choose from, rental period from 2 days.
Resident
From $0.90 for 1 GB. 200+ countries to choose from, rental period from 30 days.
Use cases:
Use cases:
Tools:
Company:
About Us:
Memu Play, created by Microvirt, is a widely used Android emulator for PCs. It replicates the processor, RAM, screen, and other features of an Android device, enabling apps and games to function on a computer just like on an actual Android device. The emulator is compatible with various Android versions, giving users the flexibility to select their preferred version for running applications. Additionally, its support for multiple screen resolutions makes it an adaptable tool for both testing and using applications.
There are two methods to configure a proxy server for the Memu Play emulator: via the main Windows operating system or using the Proxifier program. To ensure the proxy functions exclusively within the emulator, choose one of these options.
To set up a proxy server for Memu on Windows, you can use the proxy settings in the operating system itself. It is important to note that changes to system proxy settings can affect all network traffic on your computer, so be aware of this factor when using them. You can install a proxy server in Windows OS by following a few simple steps.
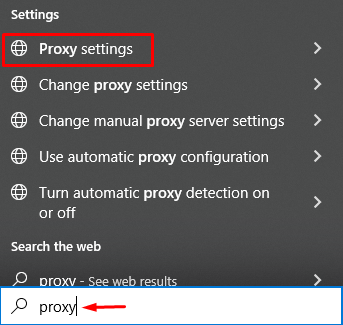
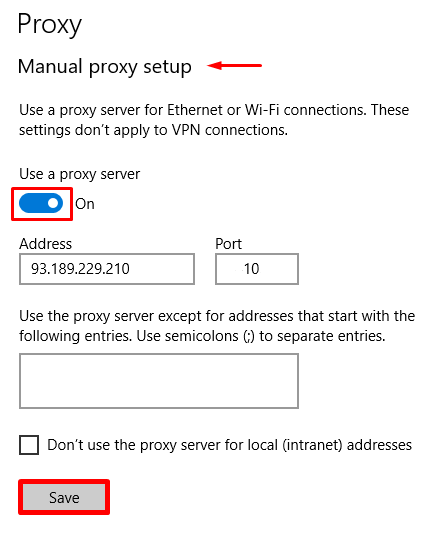
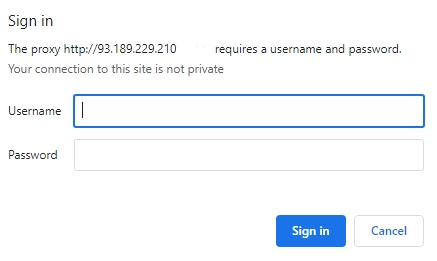
After these steps, both the Memu emulator and other applications on your computer will utilize the proxy settings configured through Windows for network communication. Remember that changing system proxy settings can affect all network traffic on your PC.
Since the Memu Play emulator does not have a built-in proxy setting function, you can use the Proxifier program to connect a proxy server. To do this, you need to follow several steps indicated in the instructions.
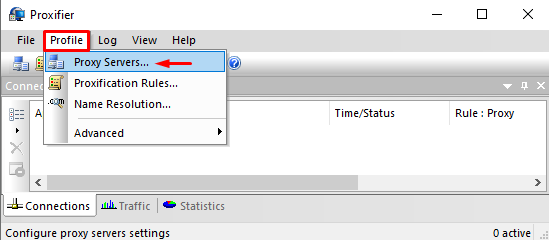
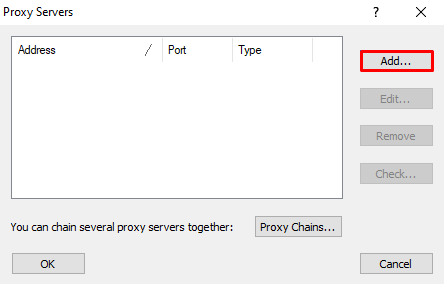
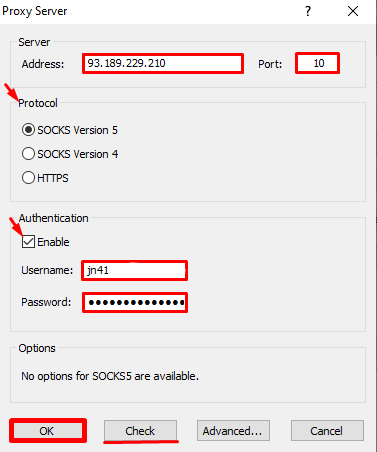
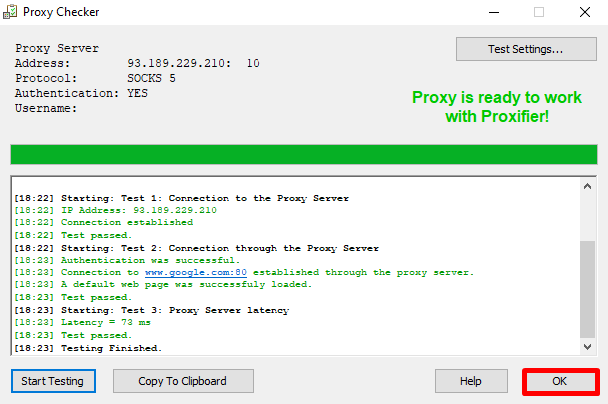
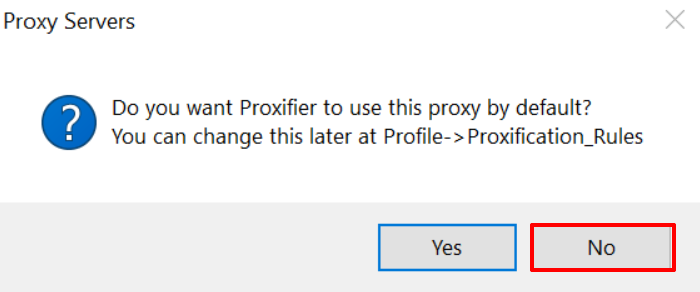
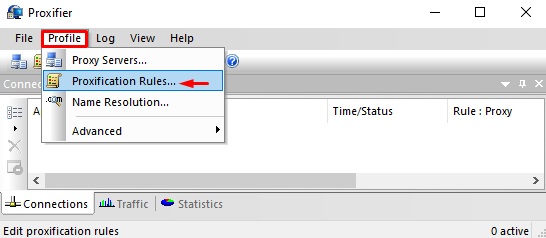
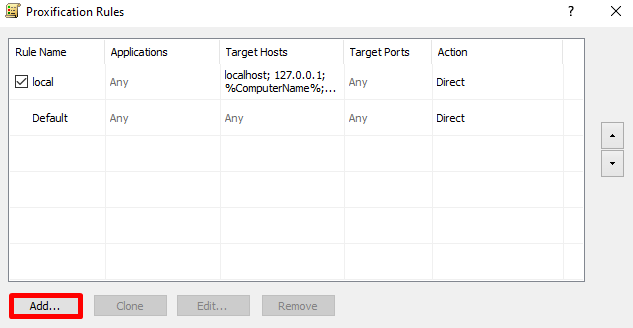
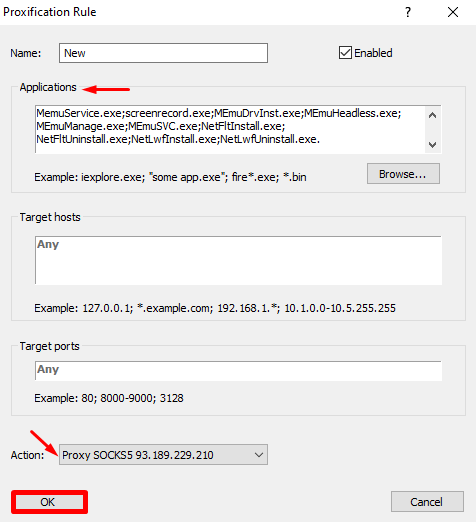
You have now successfully set up a proxy server for Memu Play using Proxifier. Verify the proxy's functionality by accessing an IP checker through any browser within the Memu emulator.
