IPv4
From $0.70 for 1 pc. 40 countries to choose from, rental period from 7 days.
IPv4
From $0.70 for 1 pc. 40 countries to choose from, rental period from 7 days.
IPv4
From $0.70 for 1 pc. 40 countries to choose from, rental period from 7 days.
IPv6
From $0.07 for 1 pc. 14 countries to choose from, rental period from 7 days.
ISP
From $1.35 for 1 pc. 21 countries to choose from, rental period from 7 days.
Mobile
From $14 for 1 pc. 14 countries to choose from, rental period from 2 days.
Resident
From $0.90 for 1 GB. 200+ countries to choose from, rental period from 30 days.
Use cases:
Use cases:
Tools:
Company:
About Us:
If you need to use a proxy server on a device running the iOS operating system, you can set it up through the device's system settings. Within these settings, you have the option to connect to private proxies that require authorization, allowing you to route all of your device's internet traffic through a server located in your selected location.
Setting up a proxy on your device changes the IP address, effectively hiding your real IP and providing several key benefits:
The following guide will cover how to set up a proxy, specifically for iPad and iPhone users.
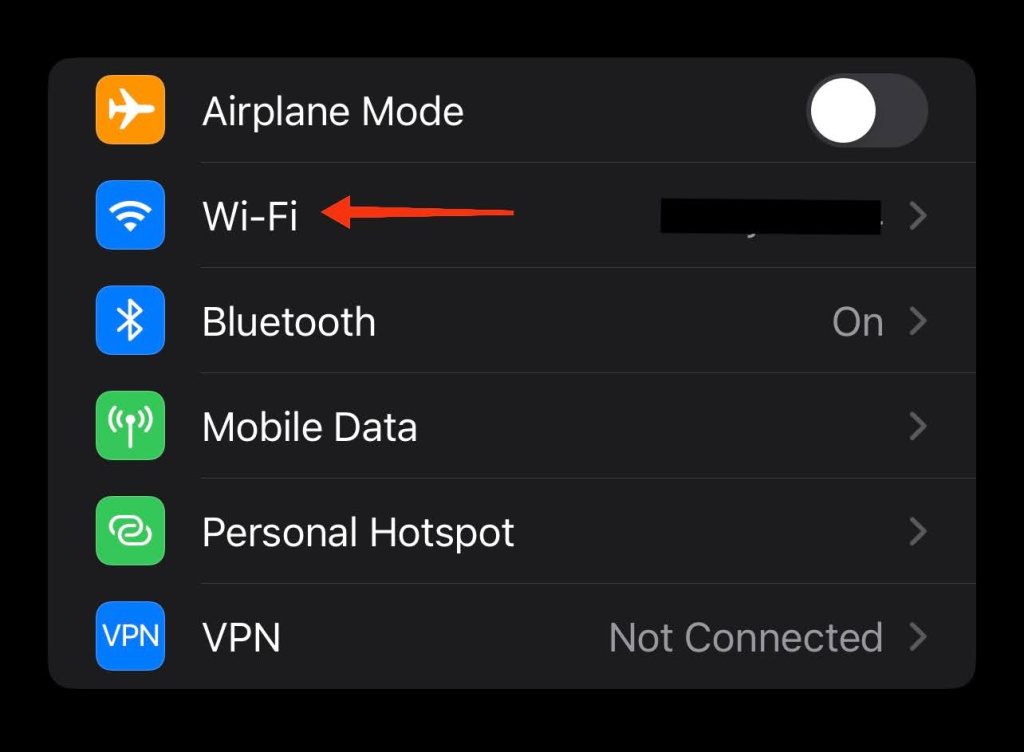
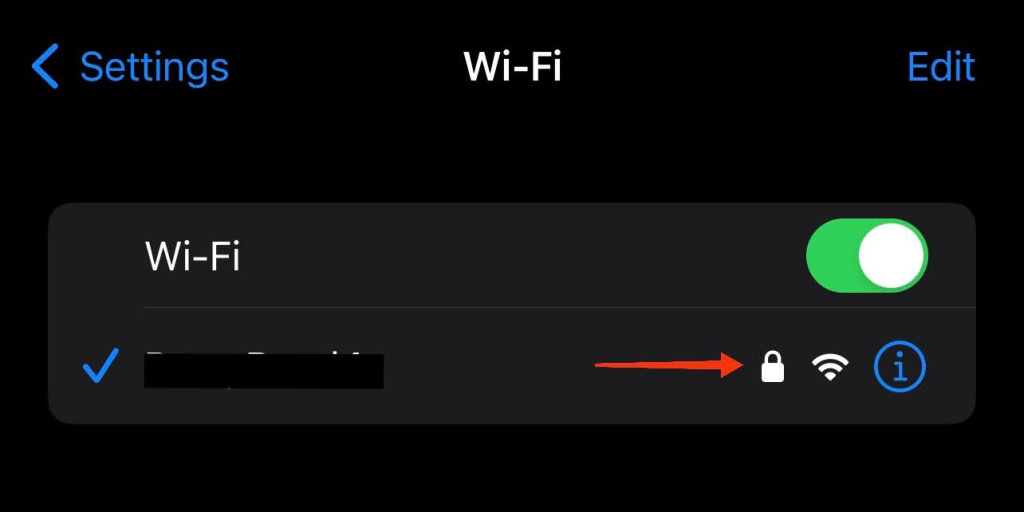
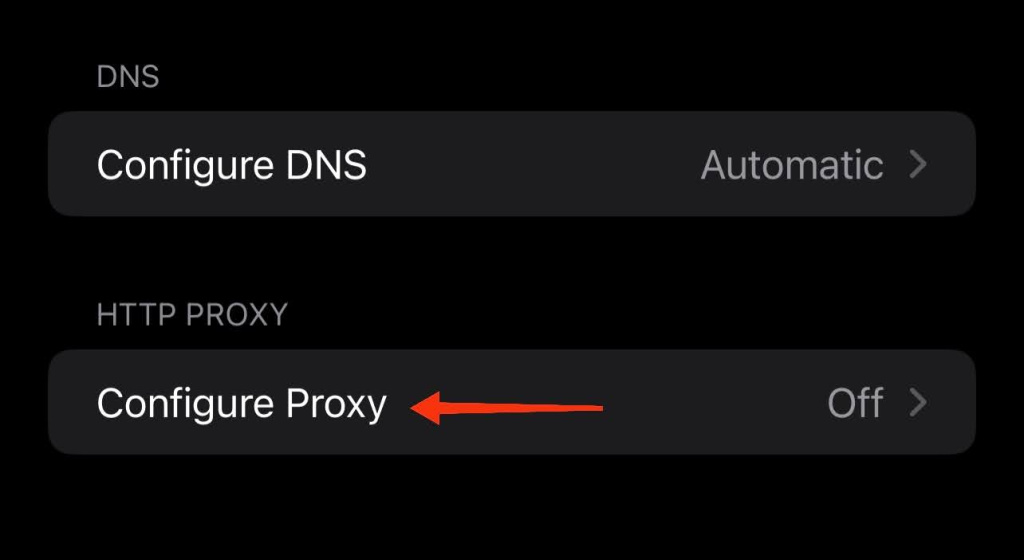
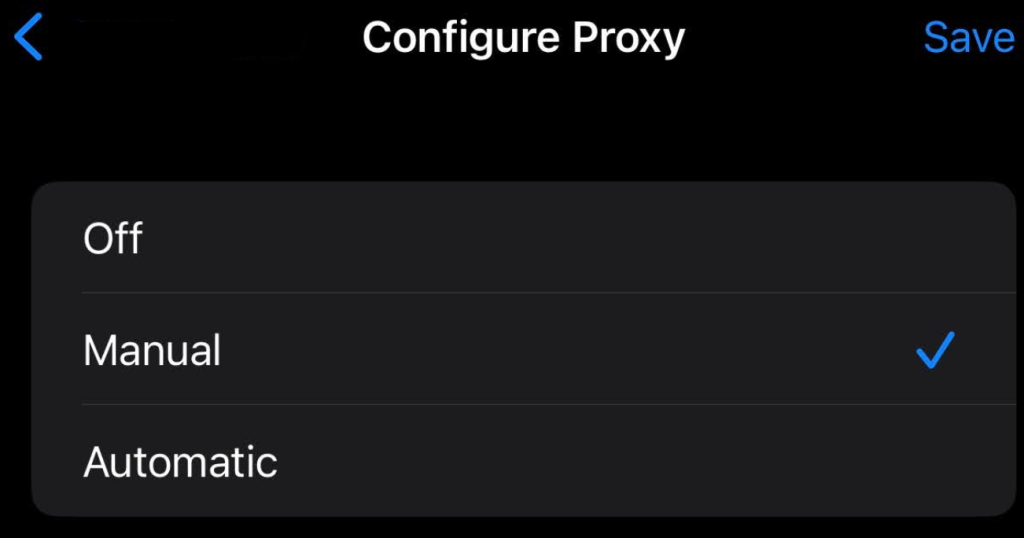
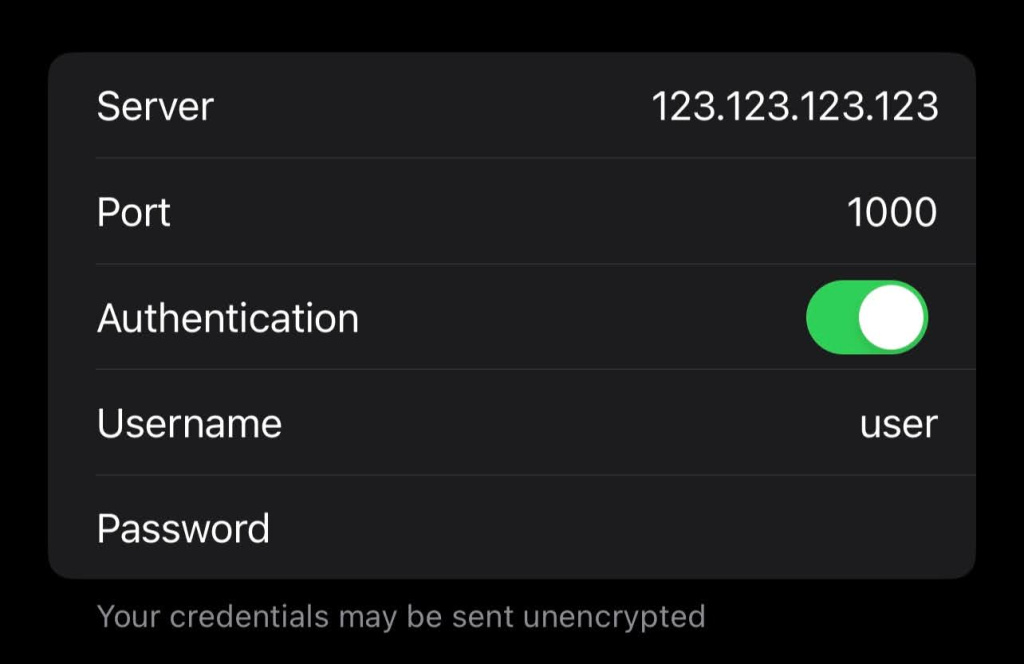
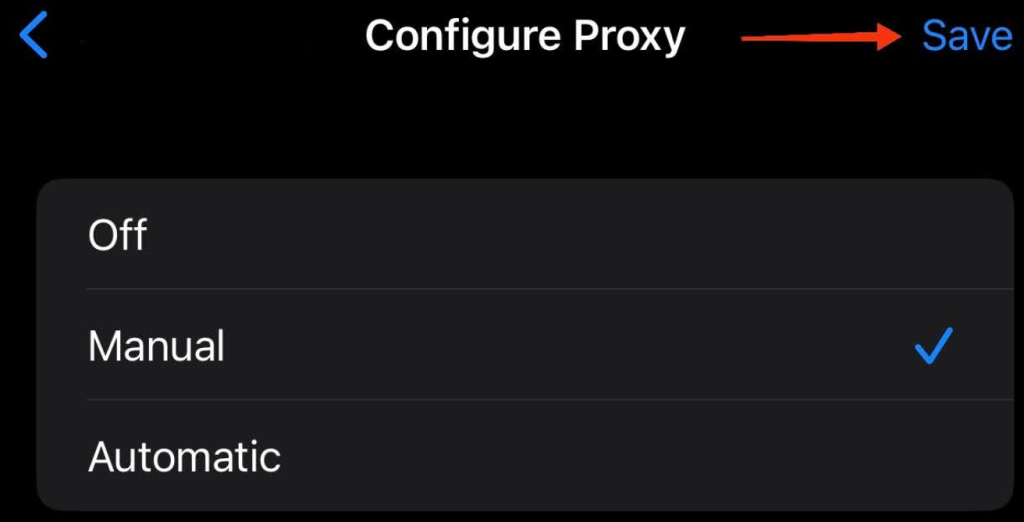
By following these instructions, all your device’s internet traffic will be routed through the proxy server, effectively masking your real IP address and enhancing your privacy when using both browsers and other apps.
To disable the proxy on an iPhone or iPad, follow these steps:
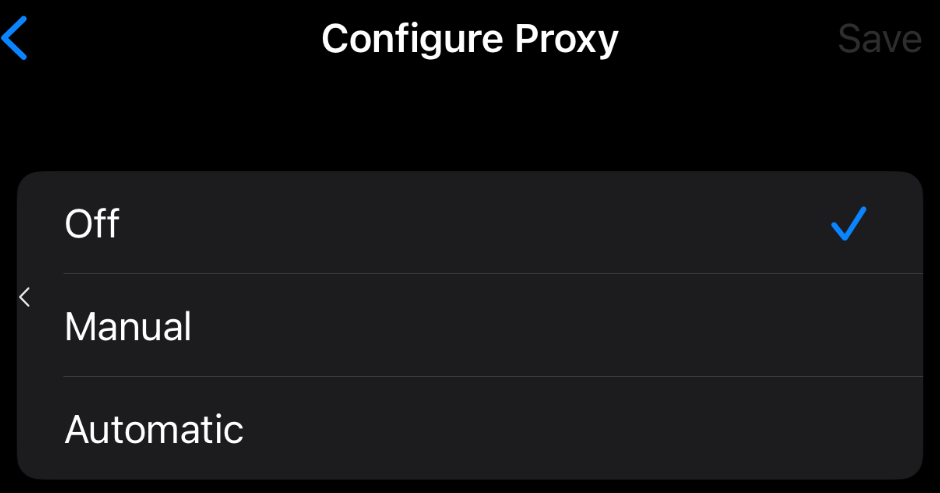
After turning off the proxy in iOS, your device will revert to displaying your real IP address when connected to the network. Keep in mind that if you decide to enable the proxy again in the future, the details of the previously used proxy server will be retained in the system settings.
