IPv4
From $0.70 for 1 pc. 41 countries to choose from, rental period from 7 days.
IPv4
From $0.70 for 1 pc. 41 countries to choose from, rental period from 7 days.
IPv4
From $0.70 for 1 pc. 41 countries to choose from, rental period from 7 days.
IPv6
From $0.07 for 1 pc. 14 countries to choose from, rental period from 7 days.
ISP
From $1.35 for 1 pc. 23 countries to choose from, rental period from 7 days.
Mobile
From $14 for 1 pc. 14 countries to choose from, rental period from 2 days.
Resident
From $0.90 for 1 GB. 200+ countries to choose from, rental period from 30 days.
Use cases:
Use cases:
Tools:
Company:
About Us:
The built-in capabilities of Windows enable you to set up a new IP address and route traffic via a proxy server without the need for third-party software. This setup is useful for unblocking content and filtering traffic with just a few clicks. However, there are times when a direct connection is necessary. Here's a quick guide on how to swiftly disable a proxy on Windows.
Instructions for Disabling the Proxy Server on Windows 11:
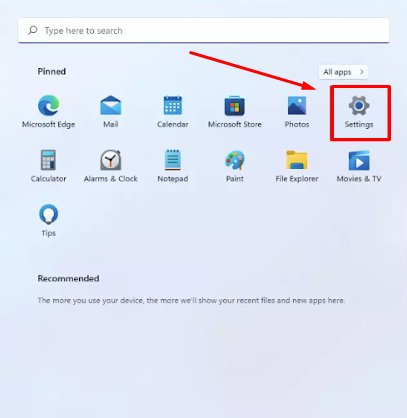
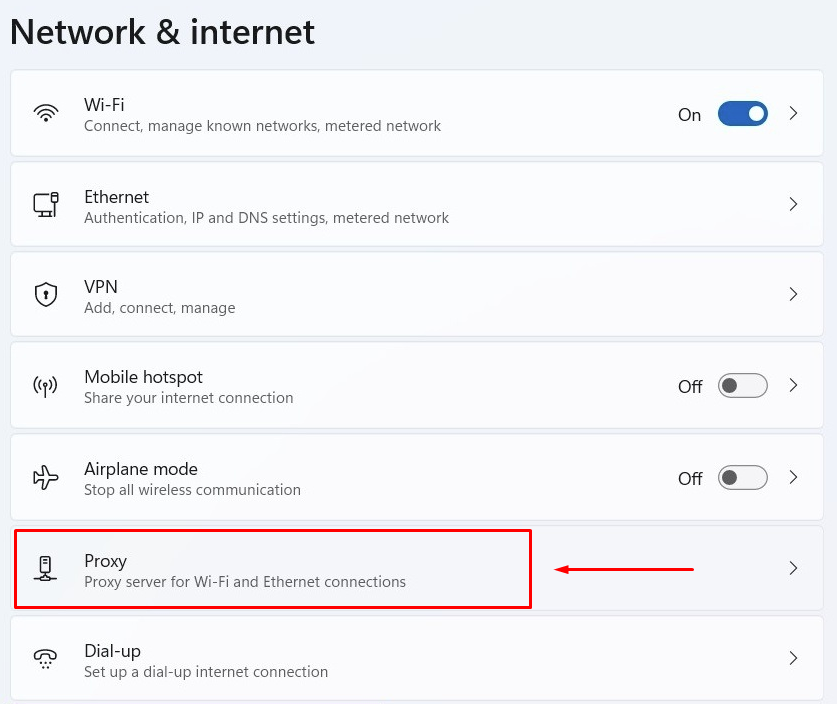

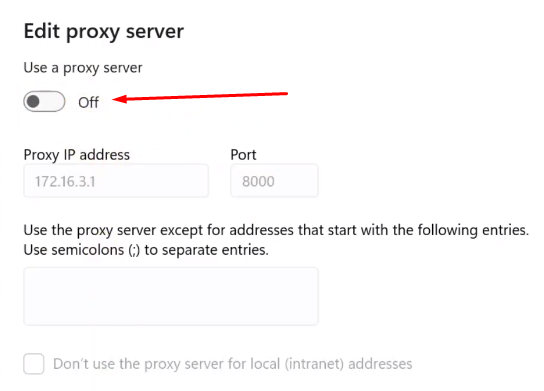
To quickly disable proxies in Windows 10 via “Settings”:
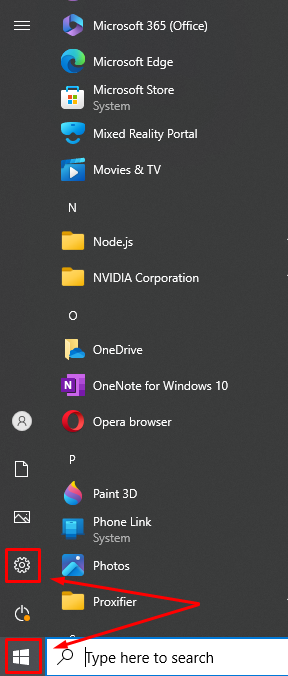
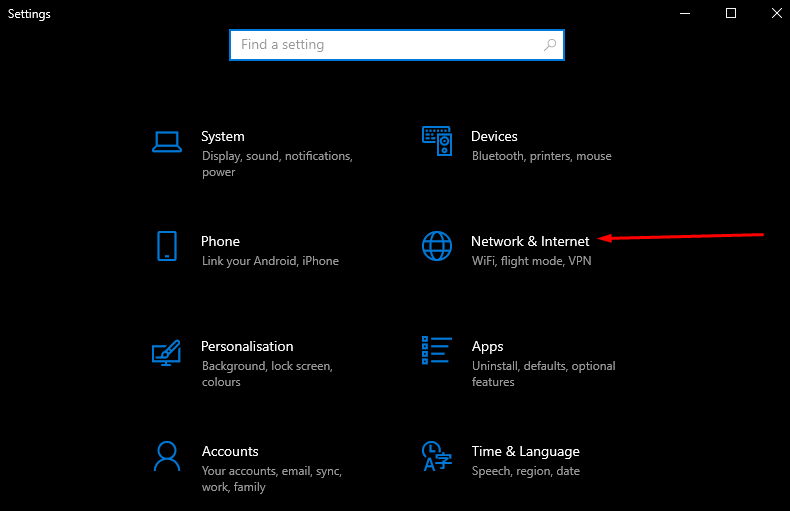
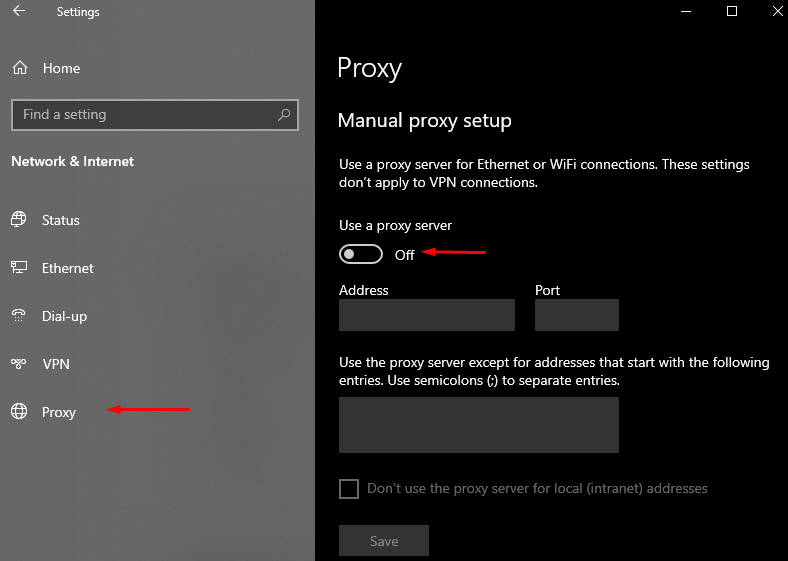
To disable the proxy server on Windows 8, follow these instructions:

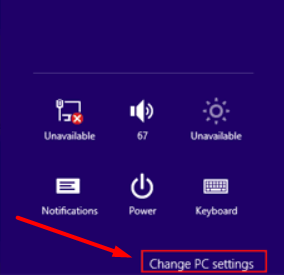
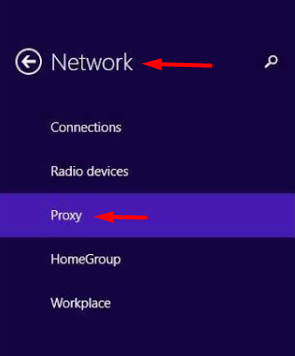
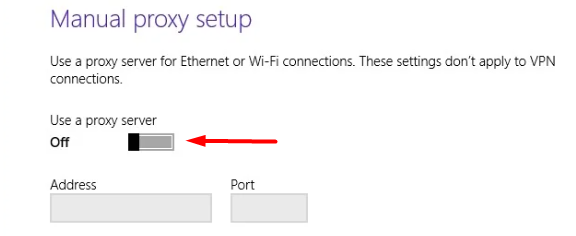
To access the proxy settings menu:
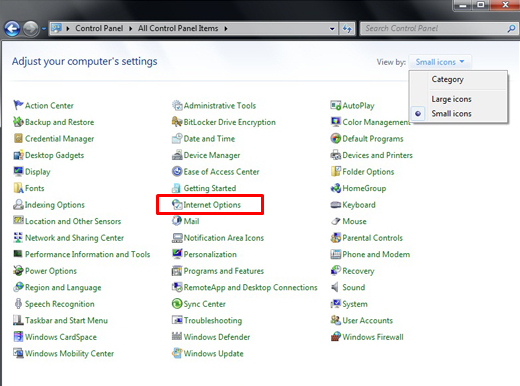
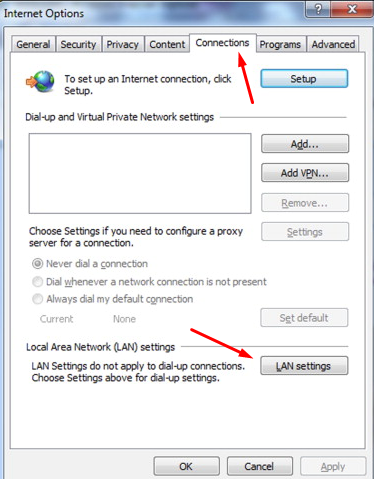
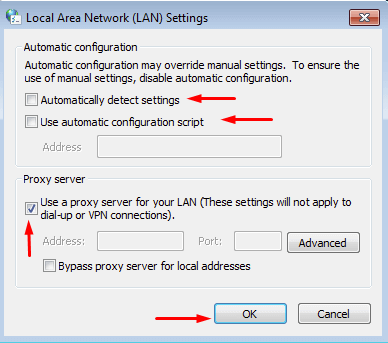
Done. Once you confirm these changes, your internet traffic will bypass the proxy and go directly through your real IP. This method can be used to disable the proxy when its functions are not required anymore, ensuring that all traffic, including that from network applications and browsers, will no longer pass through the proxy server.
