IPv4
From $0.70 for 1 pc. 40 countries to choose from, rental period from 7 days.
IPv4
From $0.70 for 1 pc. 40 countries to choose from, rental period from 7 days.
IPv4
From $0.70 for 1 pc. 40 countries to choose from, rental period from 7 days.
IPv6
From $0.07 for 1 pc. 14 countries to choose from, rental period from 7 days.
ISP
From $1.35 for 1 pc. 21 countries to choose from, rental period from 7 days.
Mobile
From $14 for 1 pc. 14 countries to choose from, rental period from 2 days.
Resident
From $0.90 for 1 GB. 200+ countries to choose from, rental period from 30 days.
Use cases:
Use cases:
Tools:
Company:
About Us:
ChatGPT, developed by OpenAI, is an AI model based on the Generative Pre-trained Transformer (GPT) architecture. It's versatile, capable of generating text, solving creative challenges, crafting stories, teaching languages, and more.
If you're in a country or are a user where access to the ChatGPT website is restricted, setting up a proxy on your operating system is a viable solution. This allows for secure registration and use of the ChatGPT site or app. However, it's important to note that once a proxy server is installed on an OS, it will affect the functioning of all installed software and applications on that device.
To log into the ChatGPT website or applications on Windows, follow these step-by-step instructions:
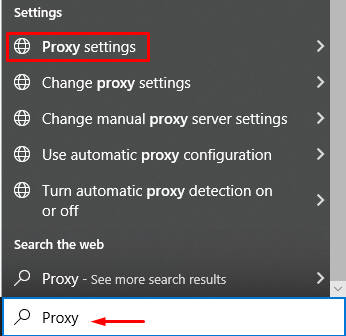
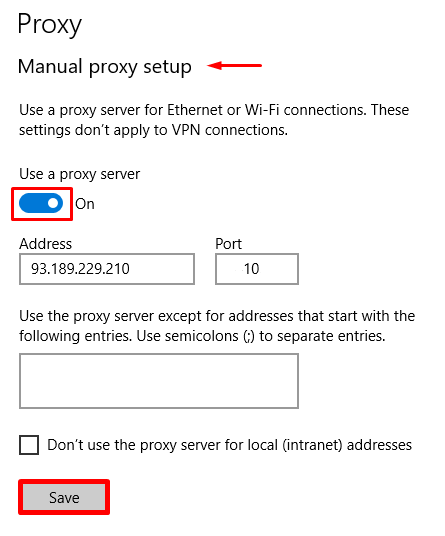
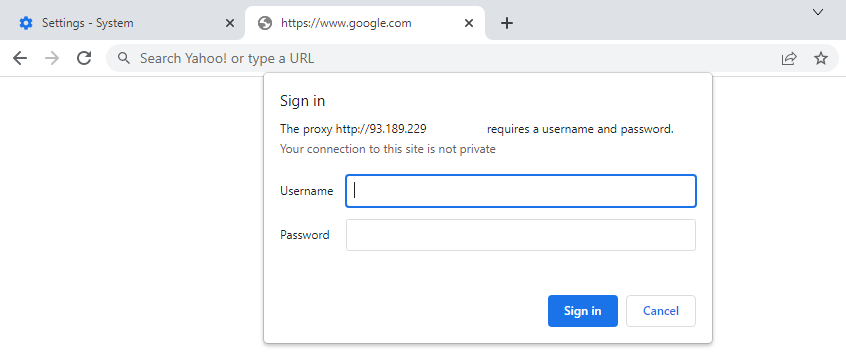
After completing these steps in Windows OS, you can access the ChatGPT website in any browser by entering your details in the proxy server authorization window.
To install a proxy server on MacOS for accessing the ChatGPT website and application, follow these steps to set up the IP address:
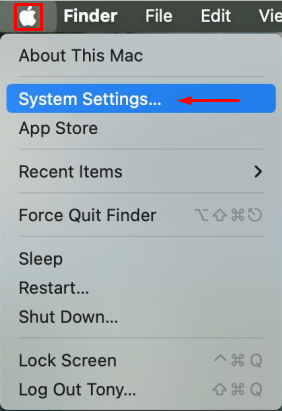
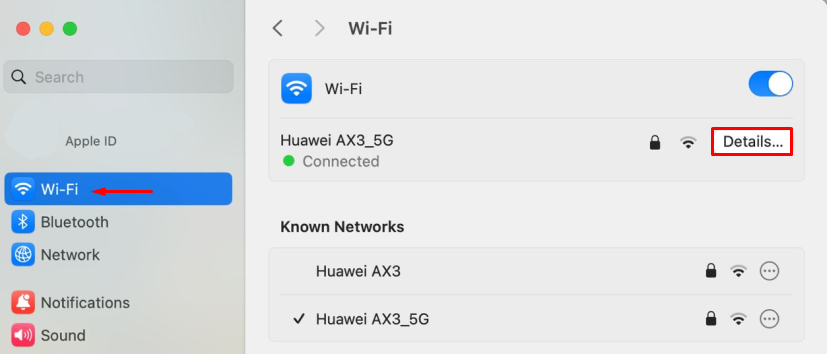
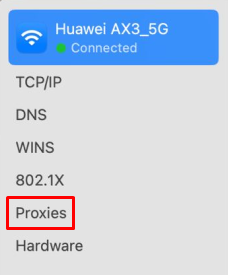
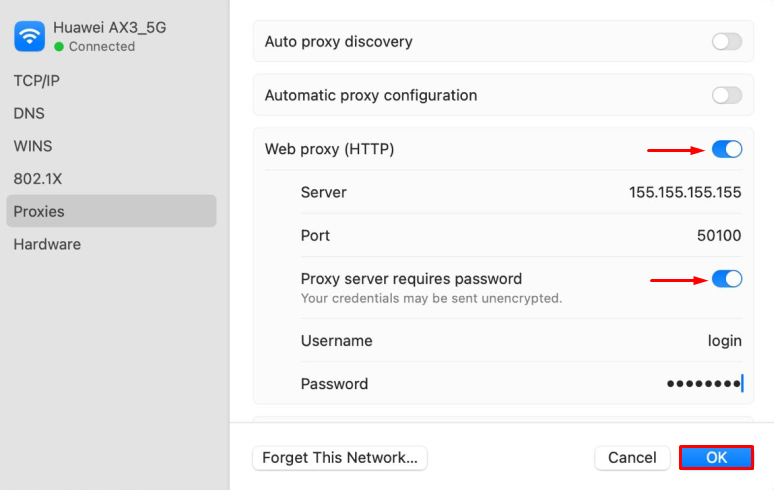
With these steps, the proxy setup in MacOS is complete, and the IP address is applied across the operating system. You are now ready to log into the ChatGPT application or website using your preferred browser.
To access the ChatGPT application and website on iOS, follow these instructions to install a proxy server:
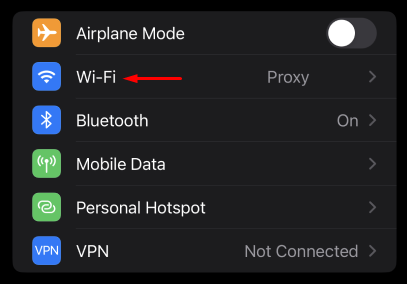
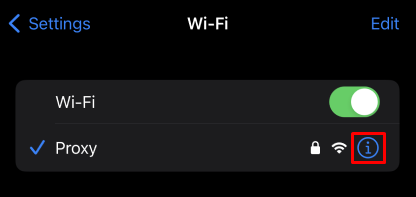
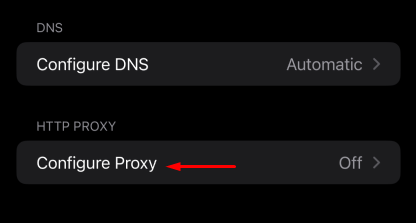
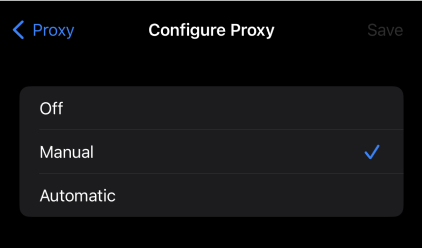
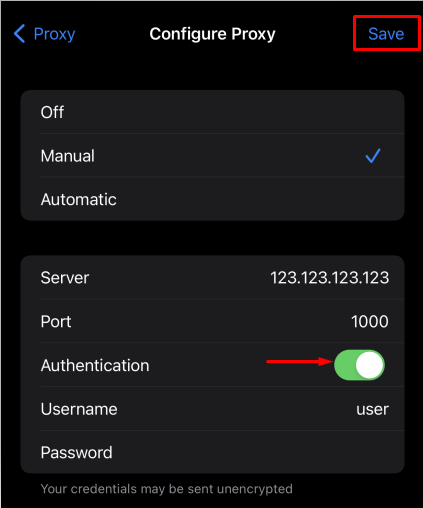
Once these steps are completed, your iOS operating system will use the configured IP address. You can now log into the ChatGPT website using your preferred browser.
To get started with the ChatGPT website on Android OS, follow these steps.
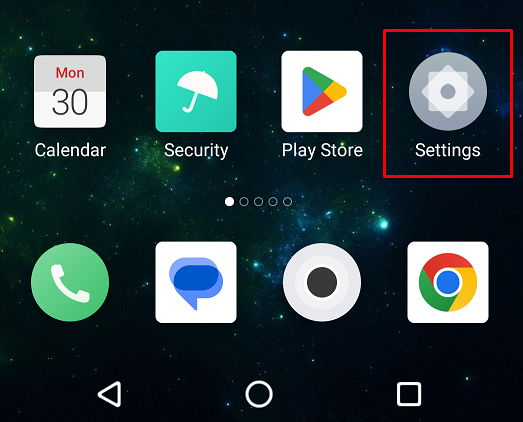
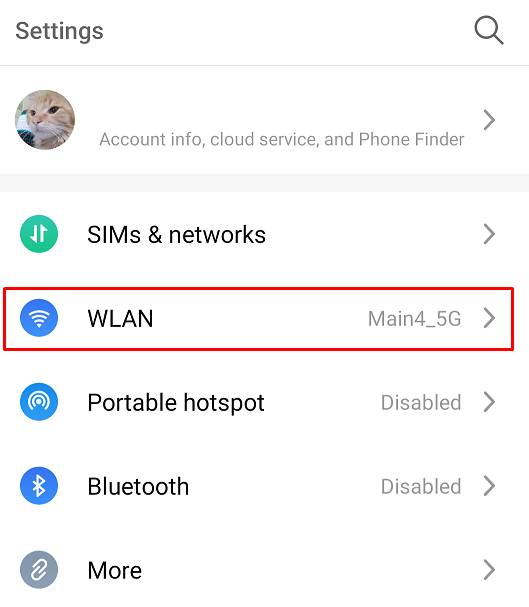
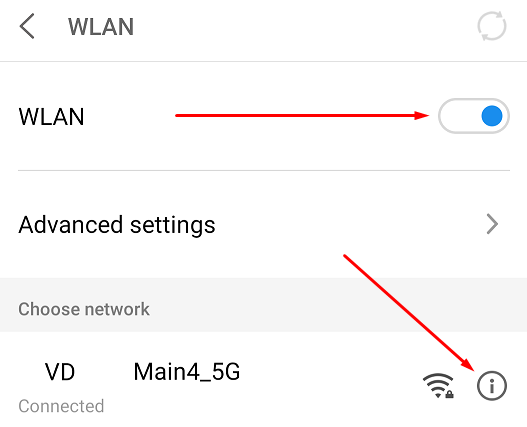
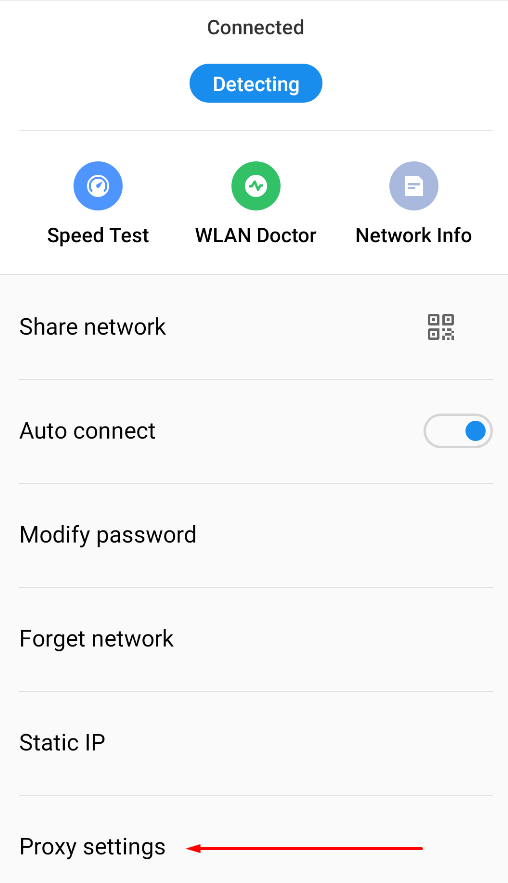
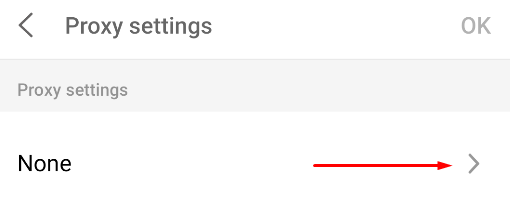
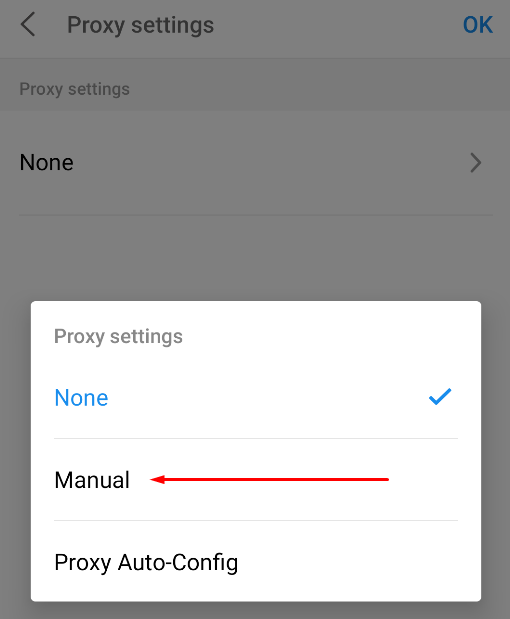
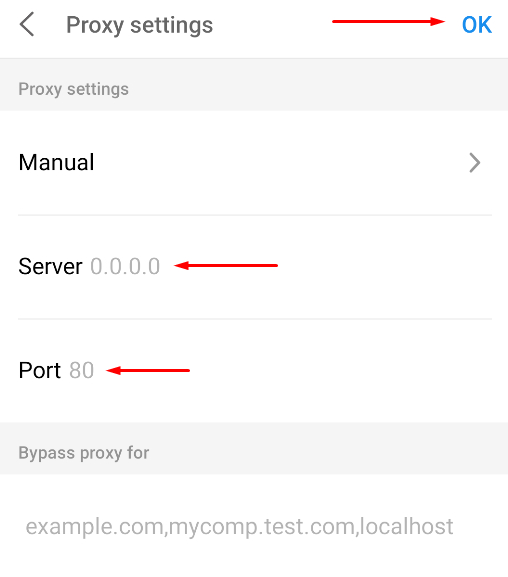
When using private proxies, the browser will display the proxy server authorization window, where you must enter authentication data: login and password. The Android system and browser will work with the set IP address, you can log in to the ChatGPT website.
Setting up a proxy on Linux involves a few key steps. Keep in mind that the specific instructions may vary based on your Linux distribution and the software you're using. Here’s a general guide:

Use the appropriate command for Debian/Ubuntu:

Red Hat/CentOS distributions:


Add the necessary lines at the end of the file


With these steps, your Linux operating system will be configured to use a proxy server for network access. You can then log in to the ChatGPT website or application.
This article has covered the essentials of setting up proxy servers on major operating systems to securely access and work with ChatGPT. By following these simple instructions, you can ensure access to the site and application via the configured IP address.
