The User-Agent is an HTTP request header sent by the browser to a server when requesting a web page. It includes details about the browser and its version, along with the user's operating system. Servers may utilize this information to tailor web page content to specific browser characteristics. Altering the User-Agent can be beneficial for testing web page displays and for accessing websites that restrict certain browsers. The most straightforward method to change the User-Agent is through browser extensions, which we will focus on, as it simplifies the entire process.
How to change User Agent in Chrome
In Google Chrome, the "User-Agent Switcher" extension allows you to emulate different browsers and devices by selecting various User-Agents.
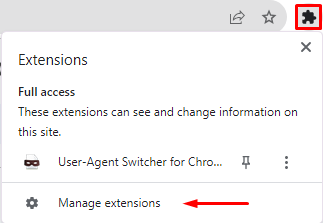
- Download and install the User-Agent Switcher extension from the Chrome web store. Once installed, an extension icon will appear in the upper right corner of the browser. Click on this icon and navigate to the “User-Agent Switcher for Chrome” submenu.
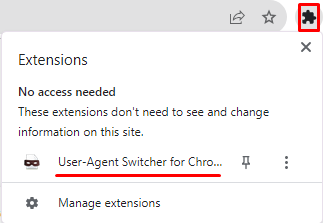
- In the menu, choose a specific User-Agent from the list that you wish to emulate, such as a particular browser and its version.
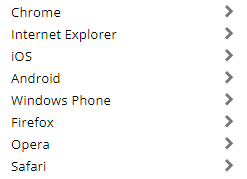
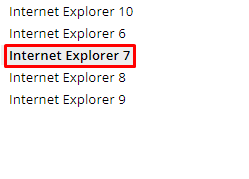
- For instance, if you select the browser version Internet Explorer 7, this version will be displayed as an icon representing the browser and its version in the extension menu.
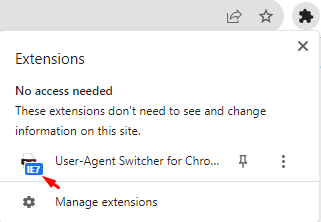
- After selecting your desired User-Agent, refresh the page to observe how the change affects the display of content and web pages.
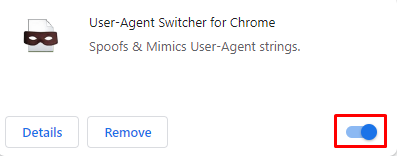
- To disable the extension, go to the menu in the upper right corner, select the “Management extensions” submenu, and deactivate the extension's slider.
Please be aware that changing the User-Agent might impact how web pages are displayed, as servers can alter how they process requests and present content based on the User-Agent specified.
Changing User Agent in Opera
Changing the User-Agent in Opera is straightforward with the User-Agent Switcher extension. Here's how to use it:
- In “Opera extensions”, search for and install the “User-Agent Switcher” extension. Once installed, click on the extensions icon in the upper right corner of the browser and navigate to the “User-Agent Switcher” submenu.
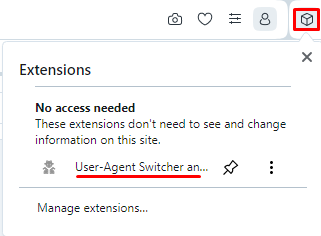
- In the displayed window, you can select the User-Agent for your needs. You’ll have options to choose from different browsers, versions, and operating systems. After making your selection, click the “Apply” button to confirm.
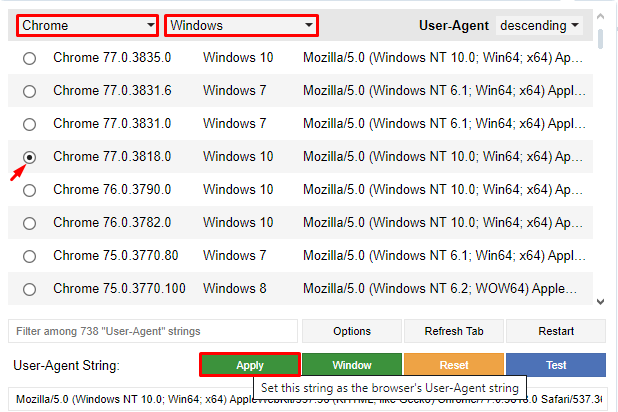
- The extension icon will change color once the new User-Agent is active. Refresh your browser to see the effects on content and page display.
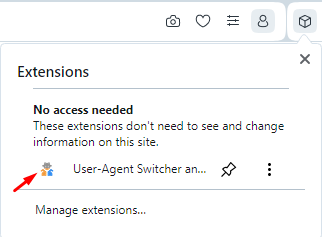
- To disable the extension and revert to the default User-Agent, go to the main menu, select “Manage extensions”, and deactivate the toggle switch for “User-Agent Switcher and Manager”.
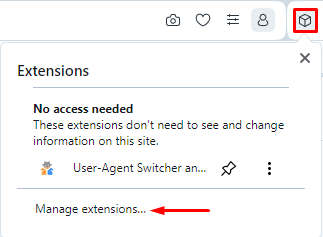
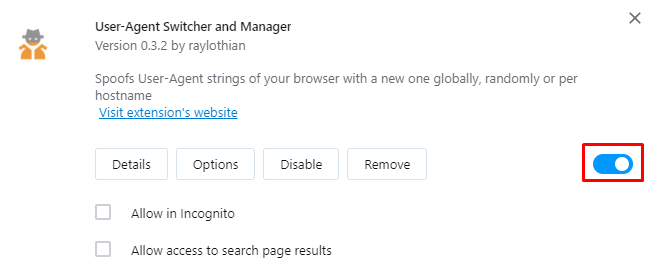
With these steps, the User-Agent in your Opera browser is successfully altered, enhancing anonymity in your web browsing experience.
How to change User Agent in Firefox
To change the User-Agent in Firefox, installing a browser extension is a convenient option. Here's how to do it:
- Install the “User-Agent Switcher” extension in your Firefox browser. Launch the extension and confirm the installation by clicking the “Add” button.
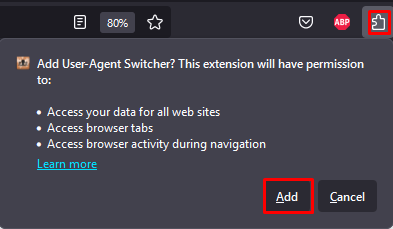
- Once installed, access the extensions menu and click on the User-Agent Switcher submenu.
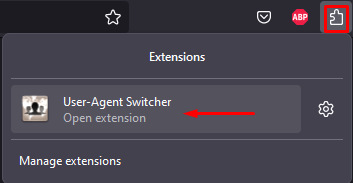
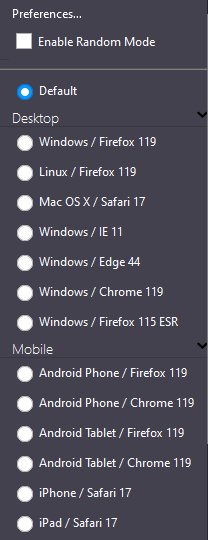
- In the resulting window, you will have the option to select the desired User-Agent from a list. After applying your choice, refresh the page to observe how the new User-Agent impacts the display of content.
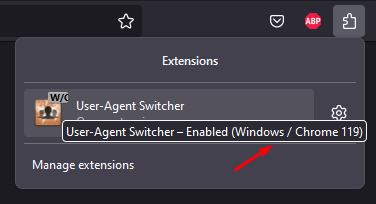
- Once you have selected a User-Agent, its details, including the operating system and browser, will be displayed in the extension window.
- If you wish to disable the extension and revert to the original User-Agent, navigate to the “Manage Extensions” submenu and turn off the slider.
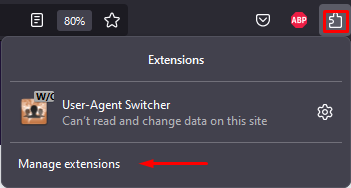

With these steps, the User-Agent in your Firefox browser has been successfully changed, allowing you to work with the new browser characteristics.
Changing User Agent in Safari
To change the User Agent in Safari through browser settings, follow these steps for a quick and efficient update:
- Open Safari and from the main menu at the top, select “Safari”, then navigate to the “Settings” section.
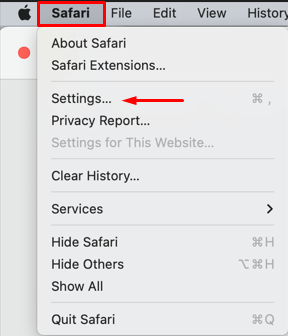
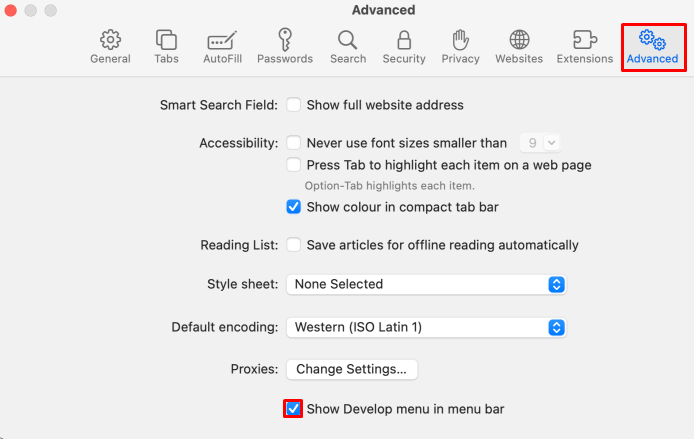
- Under the “Advanced” tab, find and check the “Show Develop menu in menu bar” option.
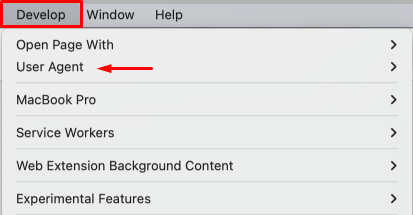
- Once the Develop menu is enabled, go to this menu and select “User Agent”.
- In the User Agent options, choose “Other” to input a custom User Agent.
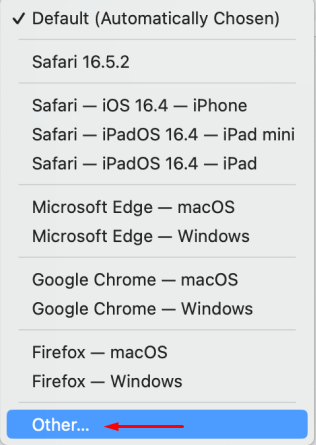
- A window will appear displaying the current User Agent. Here, you can replace it with your desired User Agent string. After entering the new data, click “OK” to save your changes. Refresh your browser to apply the new settings.
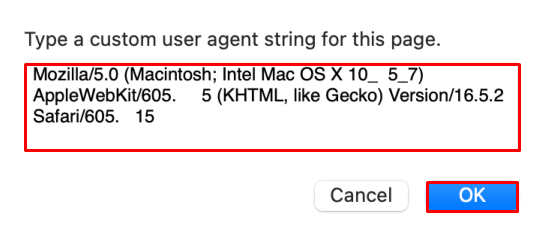
Remember, if you're unsure about what User Agent to use, you can find lists of current User Agents on specialized websites, which can be copied and pasted as needed.
How to change User Agent in Microsoft Edge
To change the User Agent in the Microsoft Edge browser, you can use an extension for a quick and easy process:
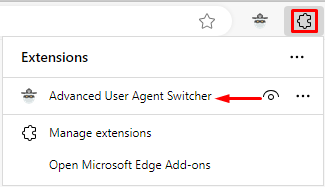
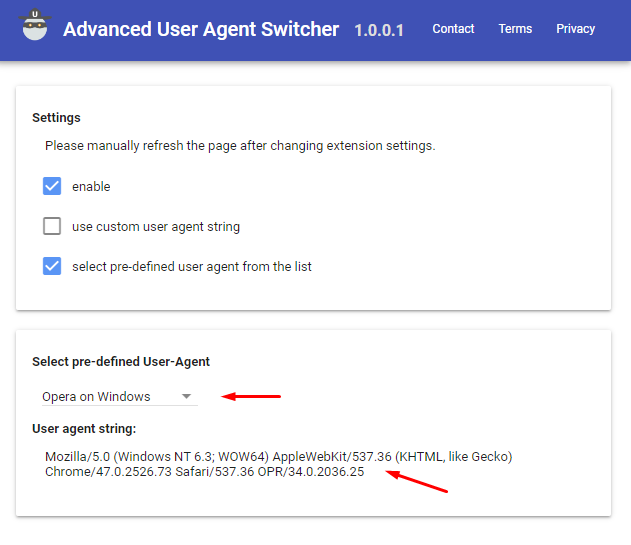
- Go to the Microsoft Edge browser store, search for, and install the “Advanced User Agent Switcher” extension. Once installed, click on the extensions icon in the upper right corner and navigate to the “Advanced User Agent Switcher” section.
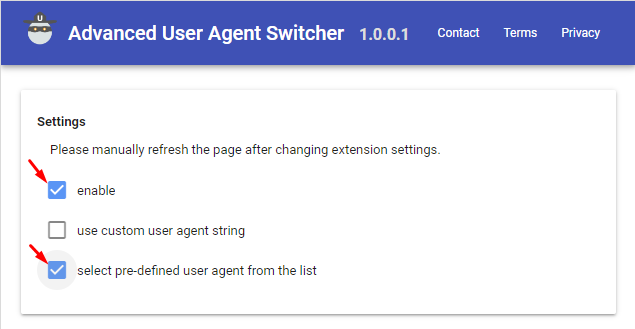
- In the opened window, ensure that the “enable” checkbox and the “select pre-defined user agent from the list” option are checked. This allows you to choose a User-Agent.
- Click on “Select” to access the list of available User-Agents.

- Choose your desired browser and operating system from the list to change the User-Agent.
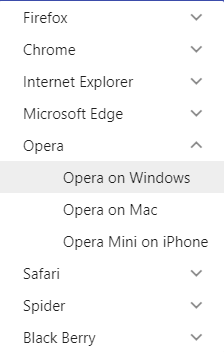
- The data for the selected User-Agent will appear as a string in the “User agent string” field. After setting this, refresh your browser page to apply the changes.
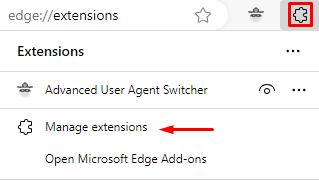
- To disable the extension, go to the “Manage extensions” section in the main menu and turn off the toggle switch.

This method provides a convenient way to change the User-Agent in Microsoft Edge, enhancing anonymity and privacy for users online. It’s part of the broader approach to adjusting User-Agent settings in popular browsers to meet specific online browsing needs.


