IPv4
From $0.70 for 1 pc. 41 countries to choose from, rental period from 7 days.
IPv4
From $0.70 for 1 pc. 41 countries to choose from, rental period from 7 days.
IPv4
From $0.70 for 1 pc. 41 countries to choose from, rental period from 7 days.
IPv6
From $0.07 for 1 pc. 14 countries to choose from, rental period from 7 days.
ISP
From $1.35 for 1 pc. 23 countries to choose from, rental period from 7 days.
Mobile
From $14 for 1 pc. 14 countries to choose from, rental period from 2 days.
Resident
From $0.90 for 1 GB. 200+ countries to choose from, rental period from 30 days.
Use cases:
Use cases:
Tools:
Company:
About Us:
Using a proxy in Minecraft, like in any online game, offers several benefits. These include:
In this article, we will delve into the process of setting up a proxy server in Minecraft.
This guide is tailored to assist you in adding a proxy for playing Minecraft on Windows, though the setup principles for Mac are similar.
How to add a proxy in Minecraft:
java -Dhttp.proxyHost=PROXYIP-Dhttp.proxyPort=PROXYPORT-Xmx800m-jar run.exe
java -Dhttp.proxyHost= PROXYIP -Dhttp.proxyPort= PROXYPORT—Dproxy.User=PROXYUSERNAME-Dhttp.proxyPassword=PROXYPASSWORD-Xmx800m-jar run.exe
java -DsocksProxyHost= PROXYIP-DsocksProxyPort= PROXYPORT-Xmx800m-jar run.exe
java -DsocksProxyHost= PROXYIP-DsocksProxyPort= PROXYPORT-.User=PROXYUSERNAME-Dsocks.proxyPassword=PROXYPASSWORD-Xmx800m-jar run.exe

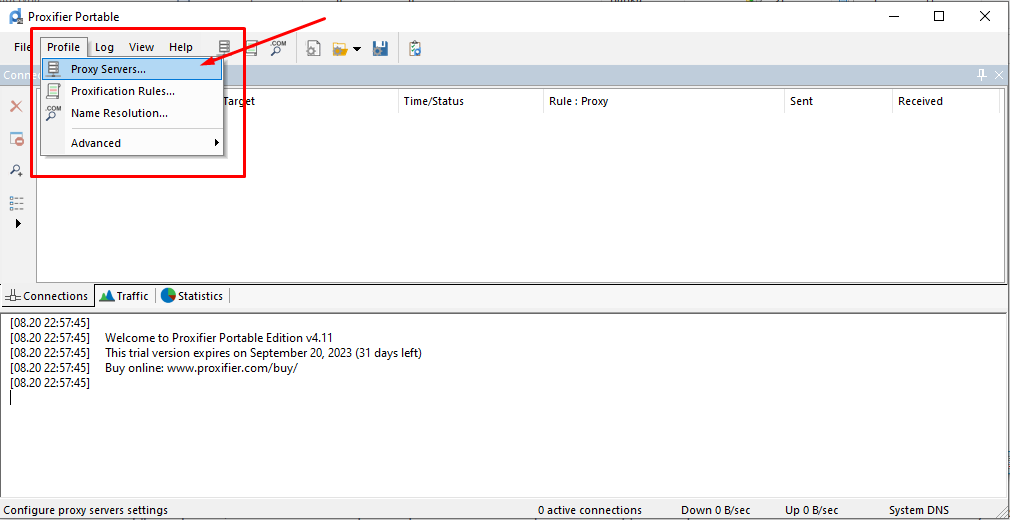
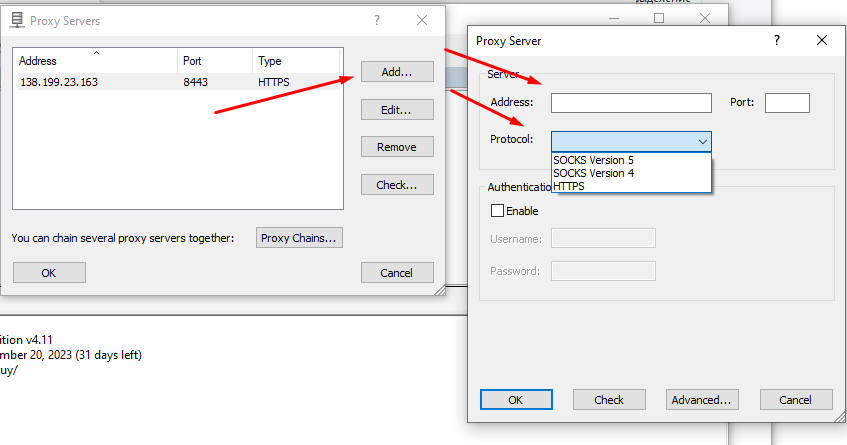
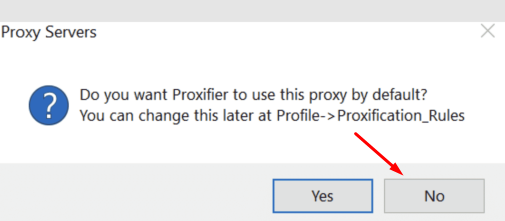
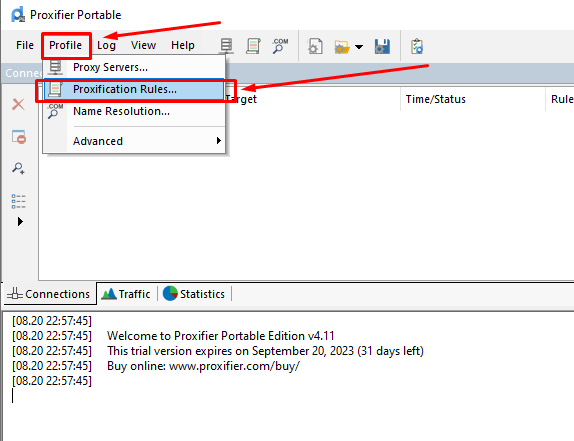
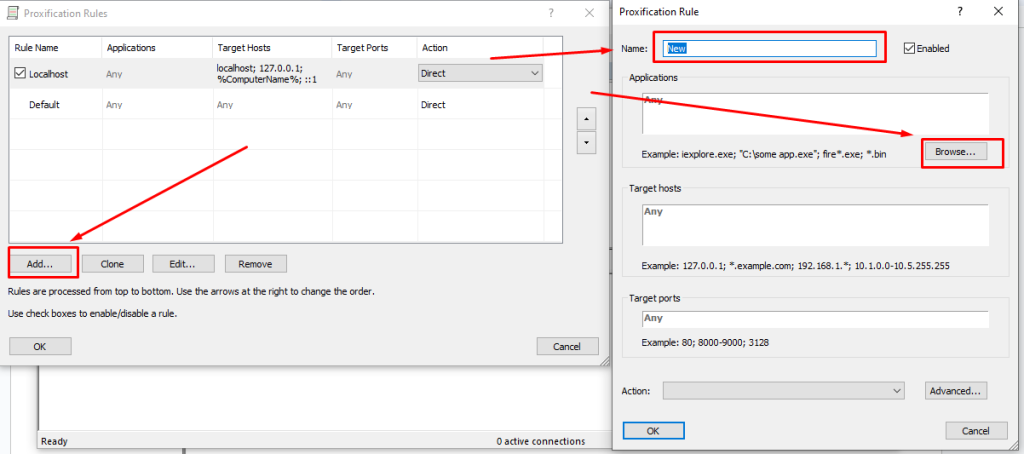
After completing these steps, your game account will use a new IP address. This provides additional security against hacking, allows for bypassing blocks, and is suitable for managing multiple accounts.
