IPv4
From $0.70 for 1 pc. 41 countries to choose from, rental period from 7 days.
IPv4
From $0.70 for 1 pc. 41 countries to choose from, rental period from 7 days.
IPv4
From $0.70 for 1 pc. 41 countries to choose from, rental period from 7 days.
IPv6
From $0.07 for 1 pc. 14 countries to choose from, rental period from 7 days.
ISP
From $1.35 for 1 pc. 23 countries to choose from, rental period from 7 days.
Mobile
From $14 for 1 pc. 14 countries to choose from, rental period from 2 days.
Resident
From $0.90 for 1 GB. 200+ countries to choose from, rental period from 30 days.
Use cases:
Use cases:
Tools:
Company:
About Us:
When you need to use multiple accounts on a single service, a fingerprint antidetect browser is a convenient solution for multi-accounting. Compatible with Windows and Mac, this browser can mimic logins from various devices, including an office laptop, a gaming station, or a mobile gadget. Each tab functions as a distinct browser (options include Chrome, Opera, Safari, Firefox, and Edge), complete with its own settings, cookies, and even customizable date, time, and IP address.
This undetectable multibrowser is a versatile tool, suitable for:
For users with a modest need for profiles and configurations (up to 10), this undetectable antidetect browser for MacOS and Windows is free. The primary additional requirement is a proxy, which is essential for maintaining anonymity and accessing blocked foreign websites.
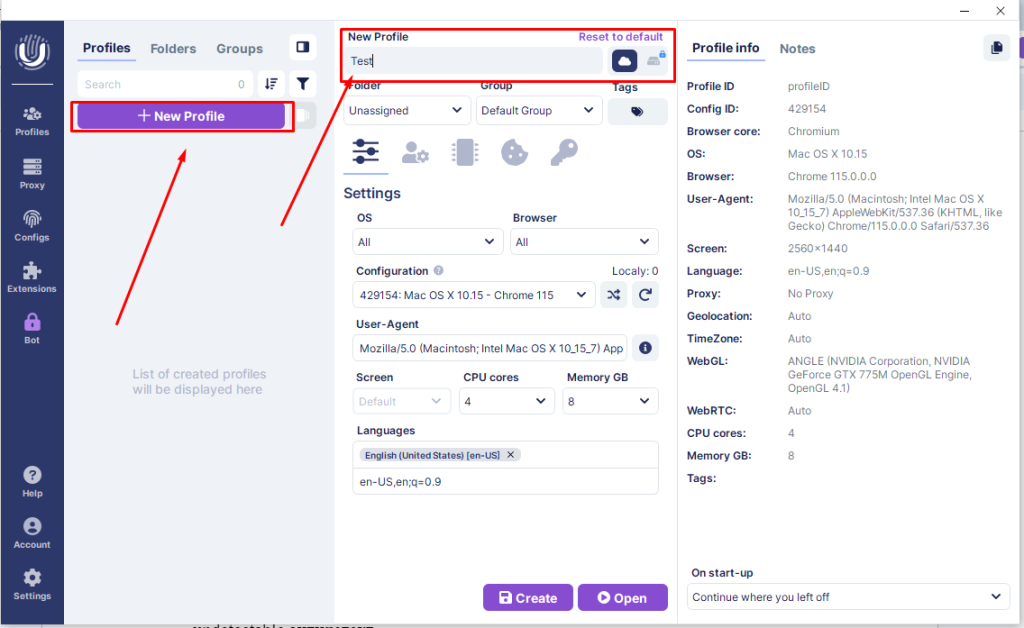
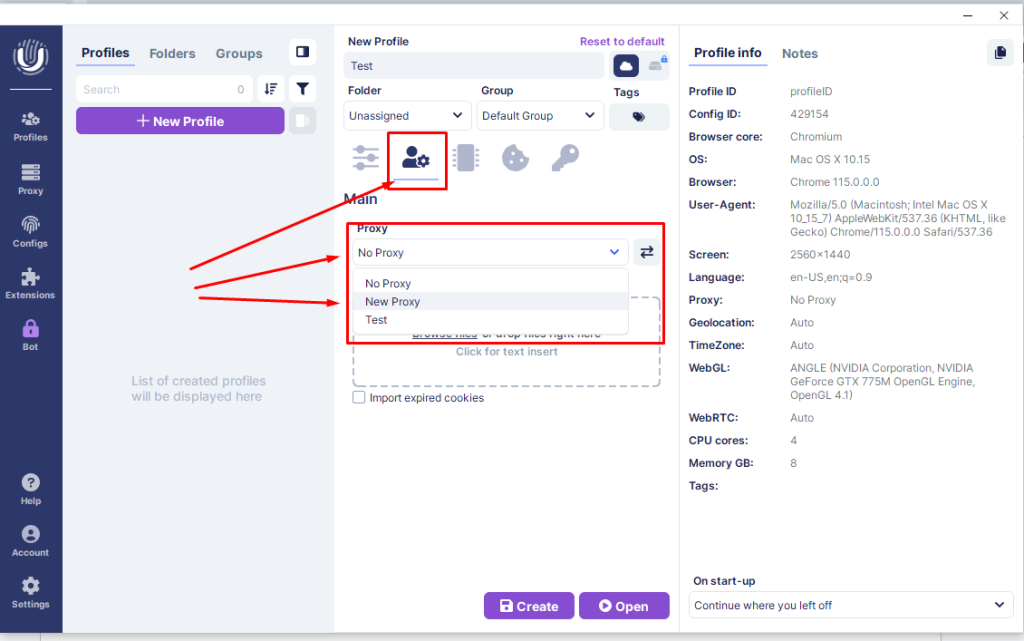
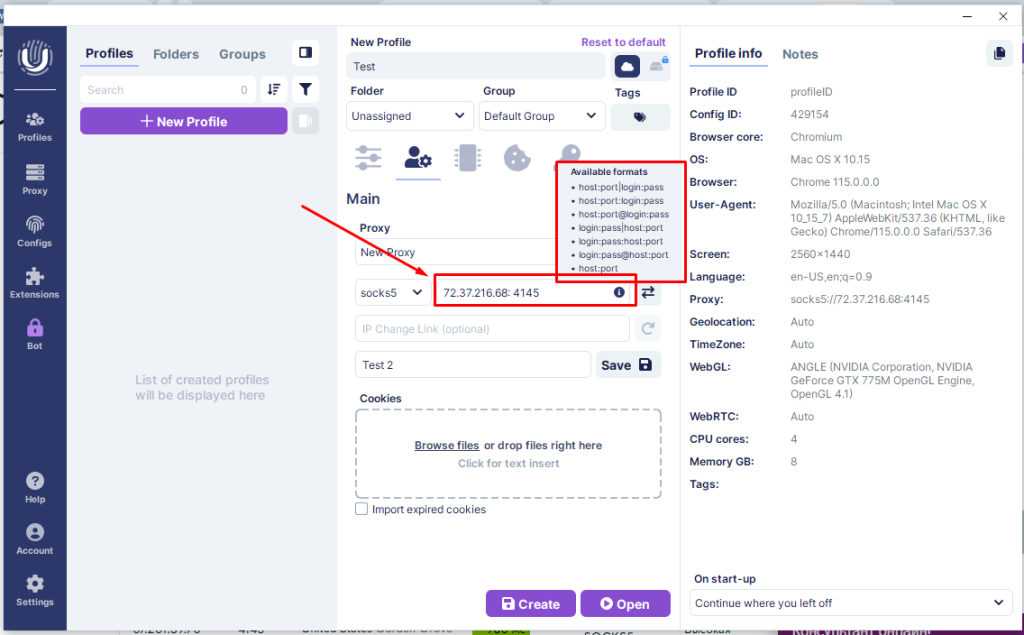
Despite its extensive customization options and the ability to finely tune the hardware configuration - essentially, the unique fingerprint of your device - this application remains user-friendly due to its well-designed interface. Setting up a proxy in the Undetectable Browser takes just 2-3 minutes:


Once done, save your changes. The added proxy will now appear in your list of connected servers and is ready for use in other profiles.
Note that the antidetect browser supports Socks5 and HTTPS proxies, which encrypt traffic. When connected, a secure connection is established, making it difficult for internet providers to track your site history, similar to VPN usage. However, in your logs, it appears as if you visited a regular encrypted site. This method is a secure way to access services blocked by your ISP.
