IPv4
From $0.70 for 1 pc. 42 countries to choose from, rental period from 7 days.
IPv4
From $0.70 for 1 pc. 42 countries to choose from, rental period from 7 days.
IPv4
From $0.70 for 1 pc. 42 countries to choose from, rental period from 7 days.
IPv6
From $0.07 for 1 pc. 14 countries to choose from, rental period from 7 days.
ISP
From $1 for 1 pc. 24 countries to choose from, rental period from 7 days.
Mobile
From $14 for 1 pc. 15 countries to choose from, rental period from 2 days.
Resident
From $0.75 for 1 GB. 200+ countries to choose from, rental period from 30 days.
Use cases:
Use cases:
Tools:
Company:
About Us:
The MuLogin browser offers the convenience of managing multiple profiles, enabling seamless switching without the need for re-authentication. Its antidetect settings allow the creation of numerous accounts with editable access for others, synchronizing user actions in a way not possible with standard browsers. Additionally, MuLogin's Windows version supports API-driven automation for bulk account registration, making it particularly useful for arbitrage purposes.
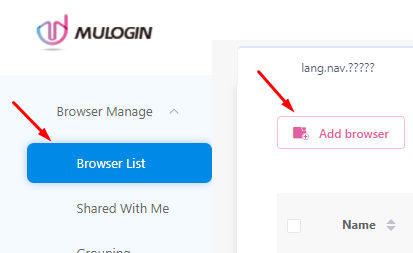
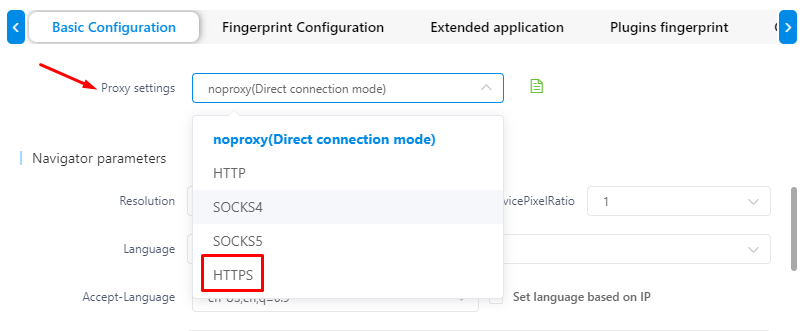
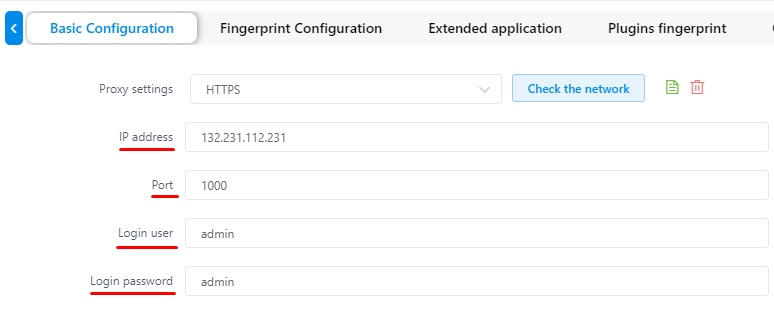
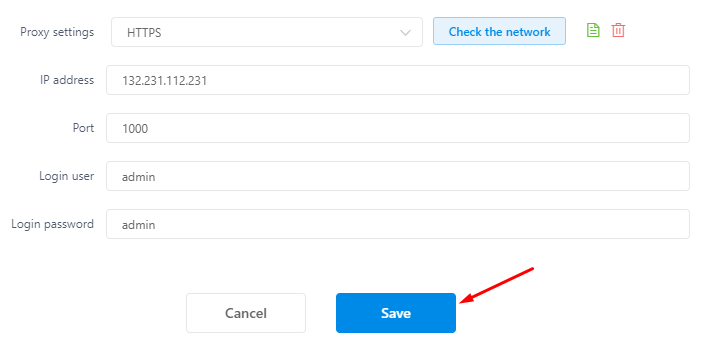
Setting up a proxy in the MuLogin antidetect browser is straightforward. Here's a step-by-step guide:


Note: To prevent character entry errors, it’s advisable to copy and paste proxy authorization data rather than typing it manually.


The proxy is now configured in the MuLogin antidetect browser, enhancing the security and anonymity of your accounts.
