IPv4
From $0.70 for 1 pc. 41 countries to choose from, rental period from 7 days.
IPv4
From $0.70 for 1 pc. 41 countries to choose from, rental period from 7 days.
IPv4
From $0.70 for 1 pc. 41 countries to choose from, rental period from 7 days.
IPv6
From $0.07 for 1 pc. 14 countries to choose from, rental period from 7 days.
ISP
From $1.35 for 1 pc. 23 countries to choose from, rental period from 7 days.
Mobile
From $14 for 1 pc. 14 countries to choose from, rental period from 2 days.
Resident
From $0.90 for 1 GB. 200+ countries to choose from, rental period from 30 days.
Use cases:
Use cases:
Tools:
Company:
About Us:
Migrant Bird Browser, or Mbbrowser, is equipped with advanced anti-detection capabilities, specifically designed for sophisticated browser fingerprint management. It supports the delegation of access to browser environments among multiple sub-accounts, enhancing teamwork effectiveness. Additionally, Mbbrowser features a comprehensive library of plugins that streamline the bulk installation and management of extensions across browser profiles.

A notable functionality of Mbbrowser is its integration with proxy servers, which is highly valued by professionals in various fields for the following applications:
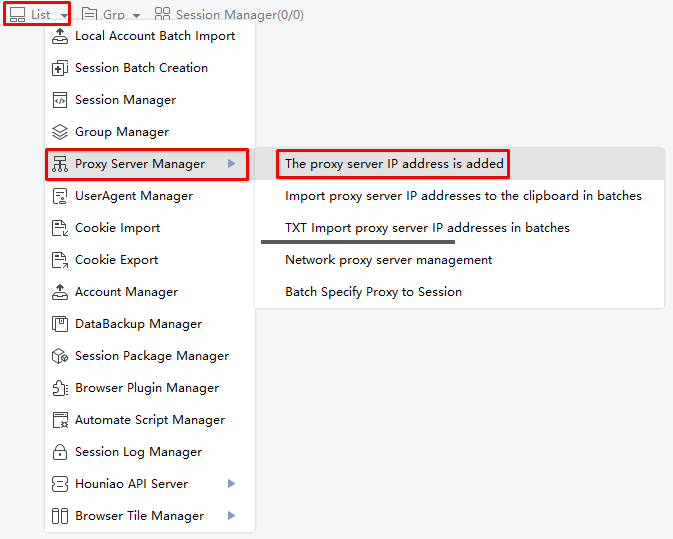
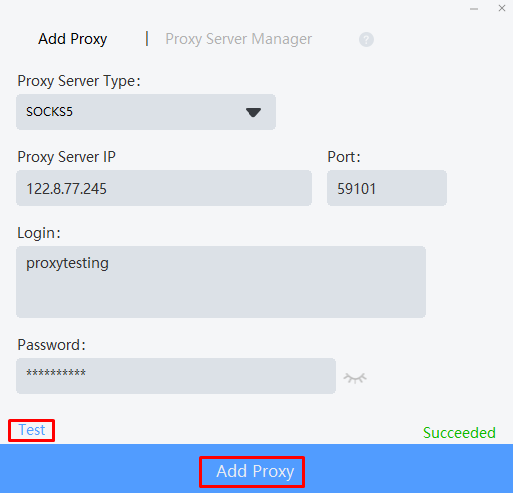
Moreover, the browser offers flexible proxy integration options, allowing users to import proxy lists from a TXT file on their device, or manually add proxies through a user-friendly interface.
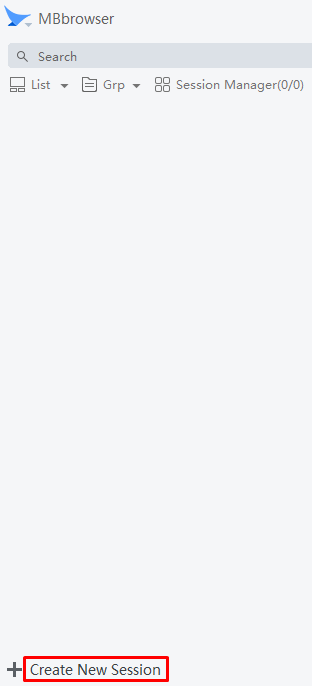
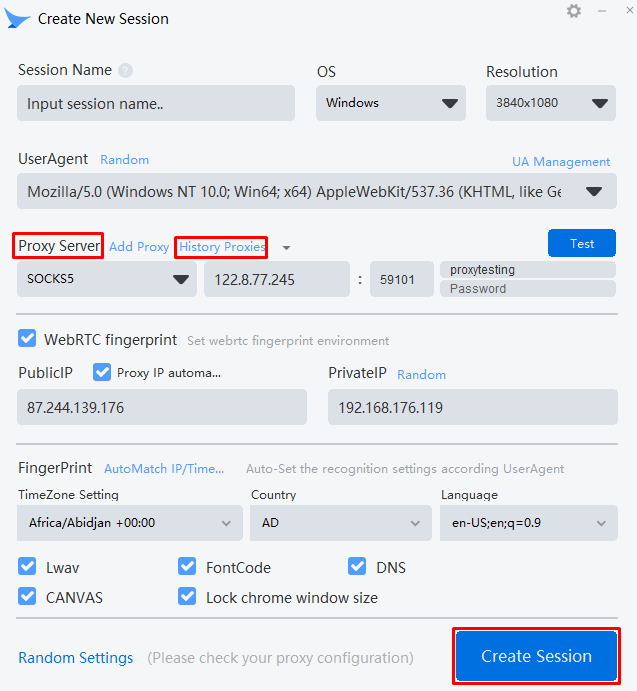
In this article, we'll delve into the detailed steps for adding a single proxy server and associating it with a new profile.


The use of proxies in Migrant Bird Browser allows each profile to be linked to a unique IP address, enhancing anonymity and security, particularly when managing multiple accounts. This feature is crucial for tasks requiring specific geolocations, such as testing advertising campaigns or accessing geographically restricted sites for data collection. For optimal privacy, it is advisable to use private proxies sourced from trustworthy providers, ensuring both the integrity and effectiveness of your activities.
